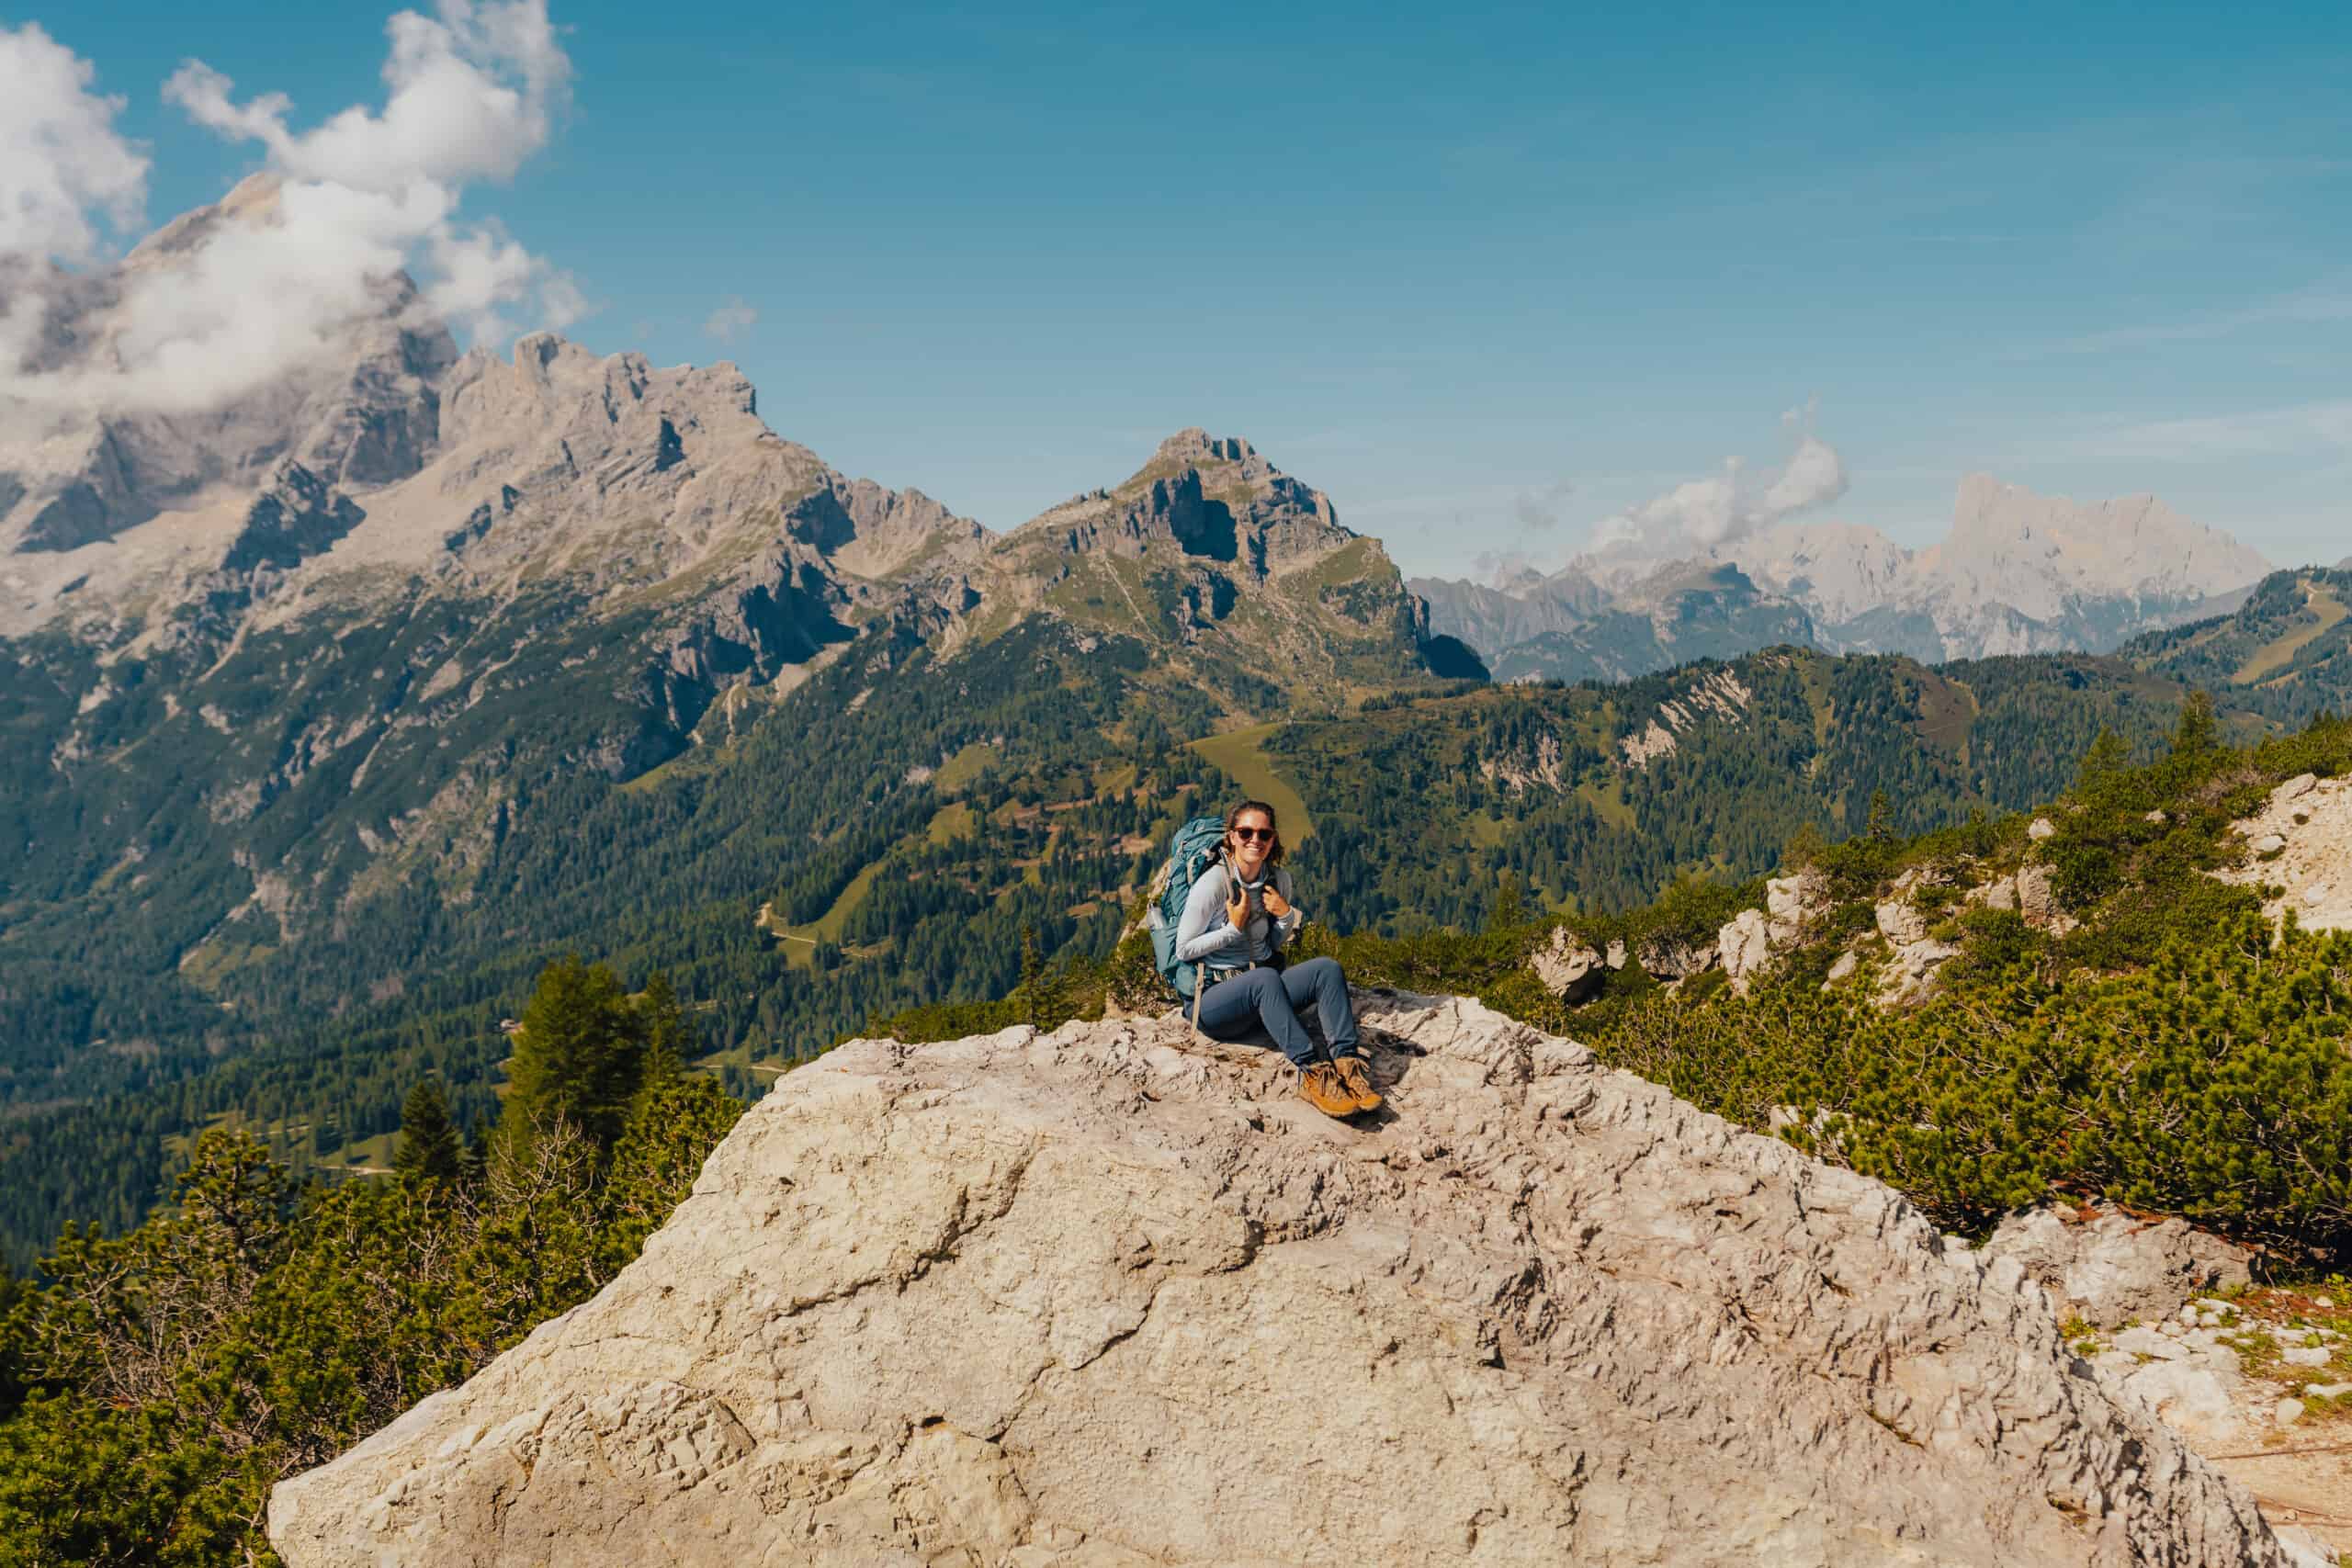
An Epic Alta Via 1 Itinerary (With Rifugio Reviews!!)
Cates Compass contains affiliate links and is a member of the Amazon Services LLC Associates Program. If you make a purchase using one of these Amazon links, I may receive compensation at no extra cost to you. Read my disclaimer for more information.
Are you curious if doing the Alta Via 1 is right for you?
The Alta Via 1 is one of, if not the, most famous hiking routes in Italy. The trek is situated in the Italian Dolomites which are North of Venice and East of Milan.
When my husband and I put together our list of hikes we wanted to do before we died, this was top of the list. It only made sense that it was one of the very first we decided to tackle.
Since this hike involves A LOT of logistics and attention to detail, I put together an Alta Via 1 Itinerary to help facilitate the planning process. While you can hire someone to do all the booking for you, if you want to save money you can 100% do it all yourself.
Alta Via 1: Quick Guide
Here are my top tips for planning a hiking trip on the Alta Via 1:
- Book Rifugios during January/February of the year you are visiting. The option to book won’t be available until this time, but they book up quickly so map out your route and know the booking dates for each accommodation.
- Fly into Venice and take a bus to Cortina d’Ampezzo. Then switch to a local bus to Dobbiacco.
- Plan for rain at some point every day and be happy when the sun is out and shining!
- Wear lightweight shoes, sweat-wicking layers, and good sun protection.
- Always carry a physical map, a decent amount of euros, and a flexible attitude in case something goes wrong.
- Book a night at a hotel in Belluno to recuperate after your trek before heading home.
Alta Via 1 Overview
The Ata Via 1 is typically completed in 8-11 days, depending on the route you choose and how far you are comfortable going each day. We planned 10 days, but bad weather on the first day turned our trek into 9 days.
Although there is varying information online about the actual length of the route, it is safe to say that the length is between 135 to 150 km (84 to 93 miles), depending on the actual final route you take.
Elevation gain and loss is another difficult statistic to measure since the trail involves a lot of up and down. Generally, you can expect over 22,000 ft. of elevation gain and over 26,000 ft. of elevation loss. Again, this varies based on route and who is measuring, but simply be aware that you will be going up and down a lot in one day.
The trail does not involve any technical pieces like Via Ferratas, although you can add them on if you’d like. There are a few instances where you’ll make use of cables or handrails that are permanently part of the trail for safety purposes.
Staying on the Alta Via 1 involves the use of Rifugios (mountain huts). Tent camping is highly frowned upon, and I would not recommend it.
To book the rifugios, reach out no later than late January or early February of the year you are going (or the earliest they open reservations). Since spots are limited each night and there are only so many rifugios on the trail, accommodation can be booked up quickly.
When To Go
The Alta Via 1 is best tackled during the warmer months, as some areas are difficult to pass in the colder months. Additionally, most rifugios are only open from June through September.
We chose to go late August through early September for the best chance of minimal thunderstorms. The difficult part of checking the weather forecast, especially for the Italian Dolomites, is that the forecast doesn’t necessarily reflect what can happen in the mountains.
Our forecast for most of the trip showed rain almost every day. It stormed the first day, but we didn’t deal with adverse weather, other than a light sprinkle here and there, for the rest of the trip.
If you don’t mind afternoon thunderstorms, July and August are also great times to go. Be advised that, regardless of which month you choose, there is always a strong possibility of rain because you are in the mountains.
September is chillier in the early morning and late evening, but I can confirm that the weather was ideal for most days.
What To Pack
The beautiful thing about hut-to-hut hiking in areas like the Dolomites is that you don’t need to carry a lot of the typical items we are used to carrying in the United States and many parts of Canada. Staying in a Rifugio means you don’t need a tent, sleeping bags, sleeping pads, food, and cooking gear.
Luckily, I’ve compiled the best packing list for hiking the Alta Via 1 as an American. The ultimate goal is to keep your pack as light as possible while bringing the essentials.
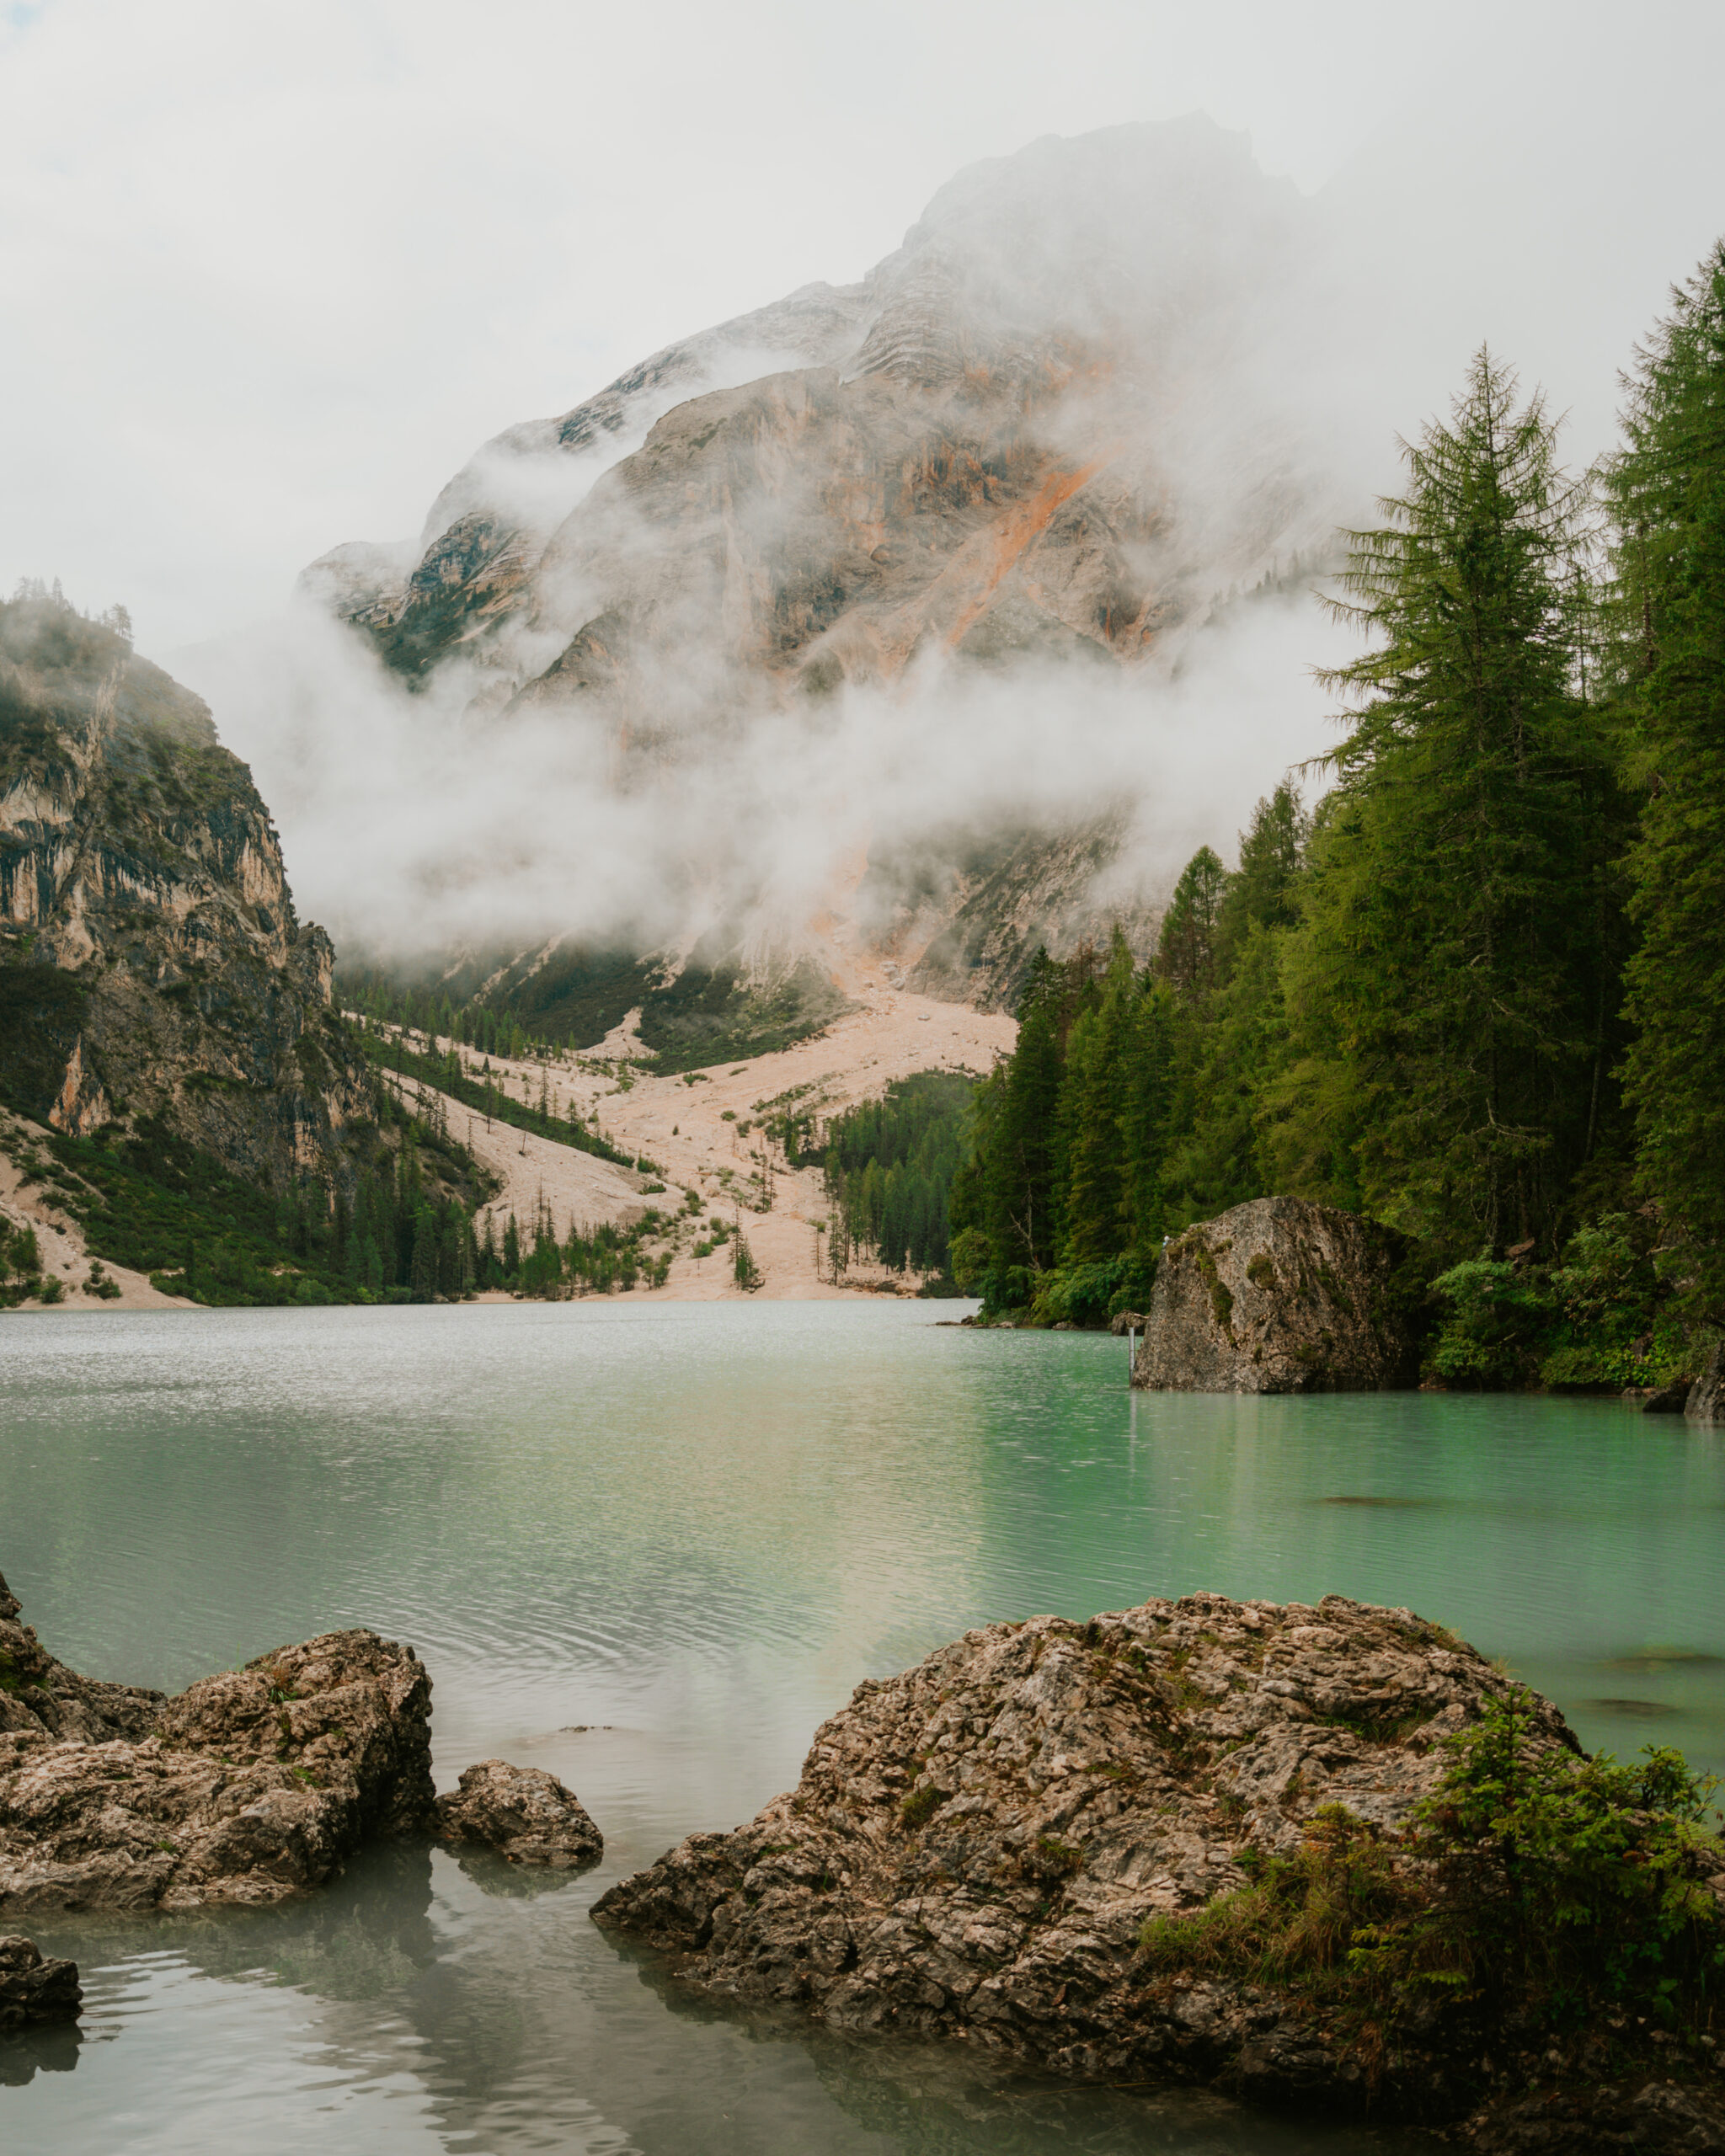
Getting to the Start: Lago Di Braies
The beginning of the Alta Via 1 is at the beautiful and famous Lago Di Braies. I recommend spending the night in the nearby town of Dobbiaco before starting on the trail.
To get to Dobbiaco you will need to take a flight to Venice or Milan. We chose Venice since it was a little closer to Dobbiaco and we knew we would have a long travel day.
From Venice, the best way to get to Dobbiaco is to book a bus to Cortina d’Ampezzo. After arriving in Cortina, you will connect to Dobbiaco on the SAD 445 Bus. This bus takes cash and is often very busy so be prepared to practically fight to get a spot on the bus.
Bonus Tip: Italians are not like Americans and do not care if you were in line first. Any time you are waiting to get onto something (bus, train, etc.) be prepared to be aggressive or simply expect to get cut in line.
Once in Dobbiaco, you will have a short walk to wherever you are staying. I’ve included my top recommendations below based on your budget.
- Budget: Youth Hostel Dobbiaco
- Mid-Range: Hotel Elslerhof
- Luxury: Romantik Hotel Santer
Connor and I stayed at Hotel Elslerhof which is more of an apartment-style hotel and it was a great spot to relax before starting our trek. The pictures do it zero justice.
We met a couple on the trail that stayed at the youth hostel and they highly recommended it if you are traveling on a budget. The youth hostel is also part of the cultural center and it has a gorgeous setting (probably the best of any hostel I’ve seen).
Be forewarned that this area of Italy speaks minimal English and you may find yourself in shops that solely speak German. We used a translator app as well as a few phrases such as “Do you speak English”, “May I have”, and “Thank You.”
If you choose Milan, you will need to take multiple trains and bus transfers. The flight prices to both cities are similar so I highly recommend you choose Venice Airport and book a direct bus to Cortina d’Ampezzo.
Check prices for your stay in Dobbiaco now!
The last piece to getting to Lago Di Braies involves taking a bus from Dobbiaco to the lake. Bus 442 from Dobbiaco will take you directly to the lake with a few local stops in between.
The ride takes about 30 minutes and online reservations are no longer required. The timetable details the full bus schedule and where it stops.
Alta Via 1: Cost Breakdown
Hiking the Alta Via 1 isn’t necessarily a cheap endeavor, especially when you think of backcountry camping in the United States.
Since you’ll be spending most nights in Rifugios (mountain huts) the cost can add up quickly. Additionally, this is a very popular destination and many of the Rifugios are accessible by day hike so the demand for rooms can be higher than in quieter areas of the Dolomites.
On top of the popularity, many of the Rifugios are privately owned and operated meaning they provide a higher level of service.
As an American, I did not find the prices to be any more expensive than a normal hotel and I was happy to pay for the experience. That being said, keep in mind that if you want the full experience (drinks, treats, hot lunch) the total cost can add up quickly.
Based on our trip in September of 2023, the typical cost of a night at a Rifugio was between 80 to 110 euros per person. Most Rifugios will take a deposit so the price you pay at the Rifugio will appear less than it was.
Here are a few breakdowns from some of the rifugios we stayed at:
- Rifugio Citta Di Fume: 127 euros
- Rifugio a Tissi: 145 euros
- Rifugio Carestiato: 198 euros
- Rifugio Lagazoui: 226 euros
All of these prices included the accommodation plus half board (dinner and breakfast). On top of that, we bought lunch at each of these rifugios whether it was a bag lunch or sit down.
In addition to these costs, you’ll want to consider any equipment you need to buy before the trip, maps, accommodation before and after, and any transportation.
Bonus Tip: All the rifugios listed in this Itinerary accepted credit cards. I do recommend carrying 200-300 euros to be safe, but it is not necessary to pay for these accomodations.
Alta Via 1: Route + Map
The map below gives a rough idea of where the Alta Via 1 is located and what to expect.
Although this is useful for a general idea, it is not beneficial for detailed planning or for navigating while you are on the trail.
The two resources that we used extensively while on the trail were the Trekking Alta Via 1 Cicerone Guide and Gaia GPS.
Every night, we reviewed the Cicerone Guide to get an idea of length, elevation changes, and any trail specifics that were good to know in advance. It was easily the most helpful resource the entire trip.
To make use of the Gaia GPS app, you will need to download a Gpx file and then load it onto the app. I referenced this every single day to get an idea of what direction we were going and if we were still on the right track.
The Gaia GPS app is also helpful so that you don’t constantly need to keep track of path numbers. It’s good to know the general path numbers for the day, but the app will show you a GPS arrow in which direction you need to go.
Bonus Tip: The Alta Via 1 path is well-marked with red and white path numbers or triangles to help guide hikers. These are typically painted on rocks and may have a 1 in the center.
Alta Via 1: Itinerary Details
Day 1: Lago di Braies to Rifugio Biella
Distance: 6 km (3.7 miles)
Time: 3-4 hours
Path Numbers: 1
Lago di Braies is an iconic lake and a beautiful location to start this trek. The bus will drop you off right at the hotel. I recommend going left to see the lake and get some pictures before starting the Alta Via 1.
The first section of the hike is around the lake. Once on the opposite side, you will begin an arduous climb up to Rifugio Biella.
Since you are on fresh legs the ascent isn’t quite as challenging, but you do gain a hefty amount of elevation. There is also a section that requires the use of a handrail for stability.
We ended up combining this day with day 2 because there were massive thunderstorms the day we were supposed to head out.
Rifugio Biella Contact Information
Phone:
+39.349 2890550
+39.335 1431251
Email:
info@rifugiobiella.com
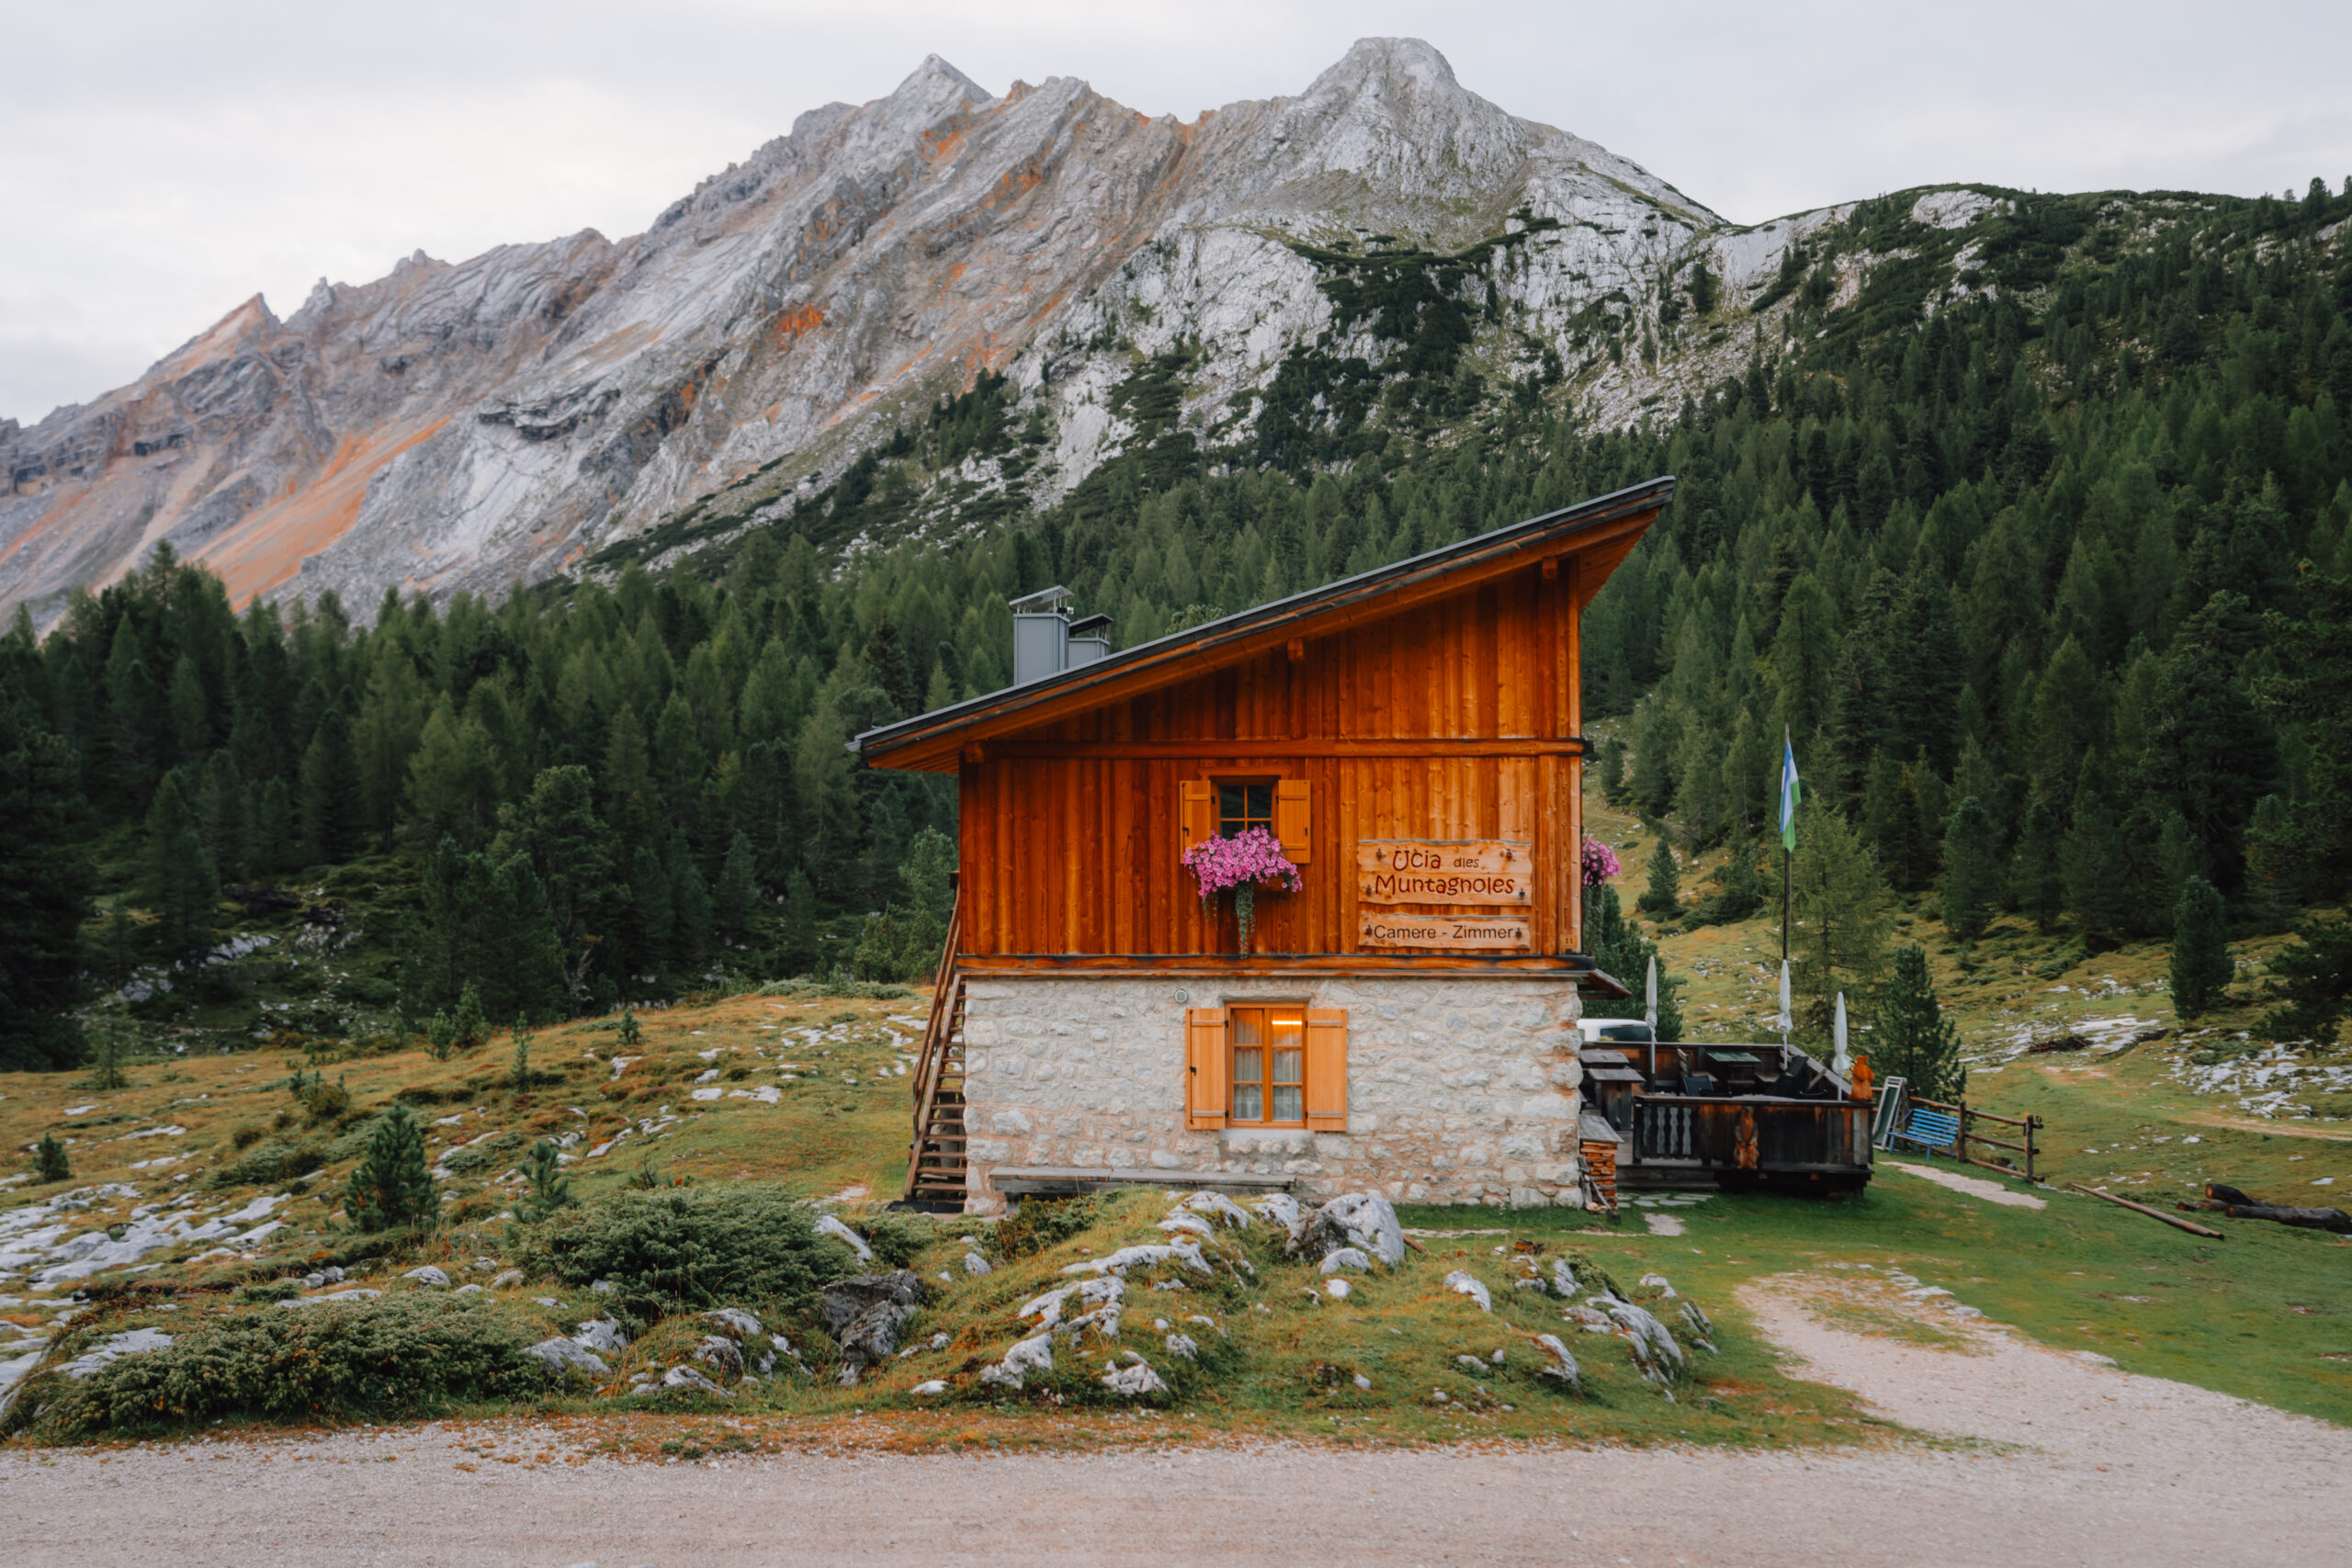
Day 2: Rifugio Biella to Ucia Montanogles
Distance: 12.7 km (8 miles)
Time: 4-5 hours
Path Numbers: 6, 6A, 7, (optional shortcut skirting Fodora Vedla using Gaia GPS)
The hike from Biella to Ucia Montanogles is not difficult except for the steep decline from the above valley down to Rifugio Pederu. If you combine days 1 and 2 like we did, I highly recommend grabbing lunch at Rifugio Sennes.
If I were to do it again, I would do my Day 1 at Rifugio Sennes (book very early) and my Day 2 at Montanogles. The food at Sennes is great, and the amenities looked a little nicer than Biella.
From Rifugio Sennes to Rifugio Pederu, the hike is entirely downhill. If you don’t own hiking poles, I highly recommend purchasing some because this was just a teaser of some of the knee-crushing sections we had to do.
The last section from Pederu up to Montanogles is gorgeous, but a tough initial uphill followed by a valley and then a second push before you reach your destination for the night.
Rifugio Montanogles is a much smaller rifugio than the typical ones on the trail, and we loved it. They had a set dinner at night, a continental breakfast, and two bathrooms that both had showers.
Ucia Montanogles Contact Information
Day 3: Ucia Montanogles to Rifugio Lagazoui
Distance: 12.5 km (7.8 miles)
Time: 5-6 hours
Path Numbers: 11, 20B, 20
To begin this day, you will head up toward Rifugio Fannes and then do an uphill road section before it flattens out into a meadow. We spotted our first marmot here, along with numerous cows (a common occurrence on the AV1).
The meadow continues for a while until a split, where you will head upward toward the Forcella Del Lago Pass. This section is a slog, but doable.
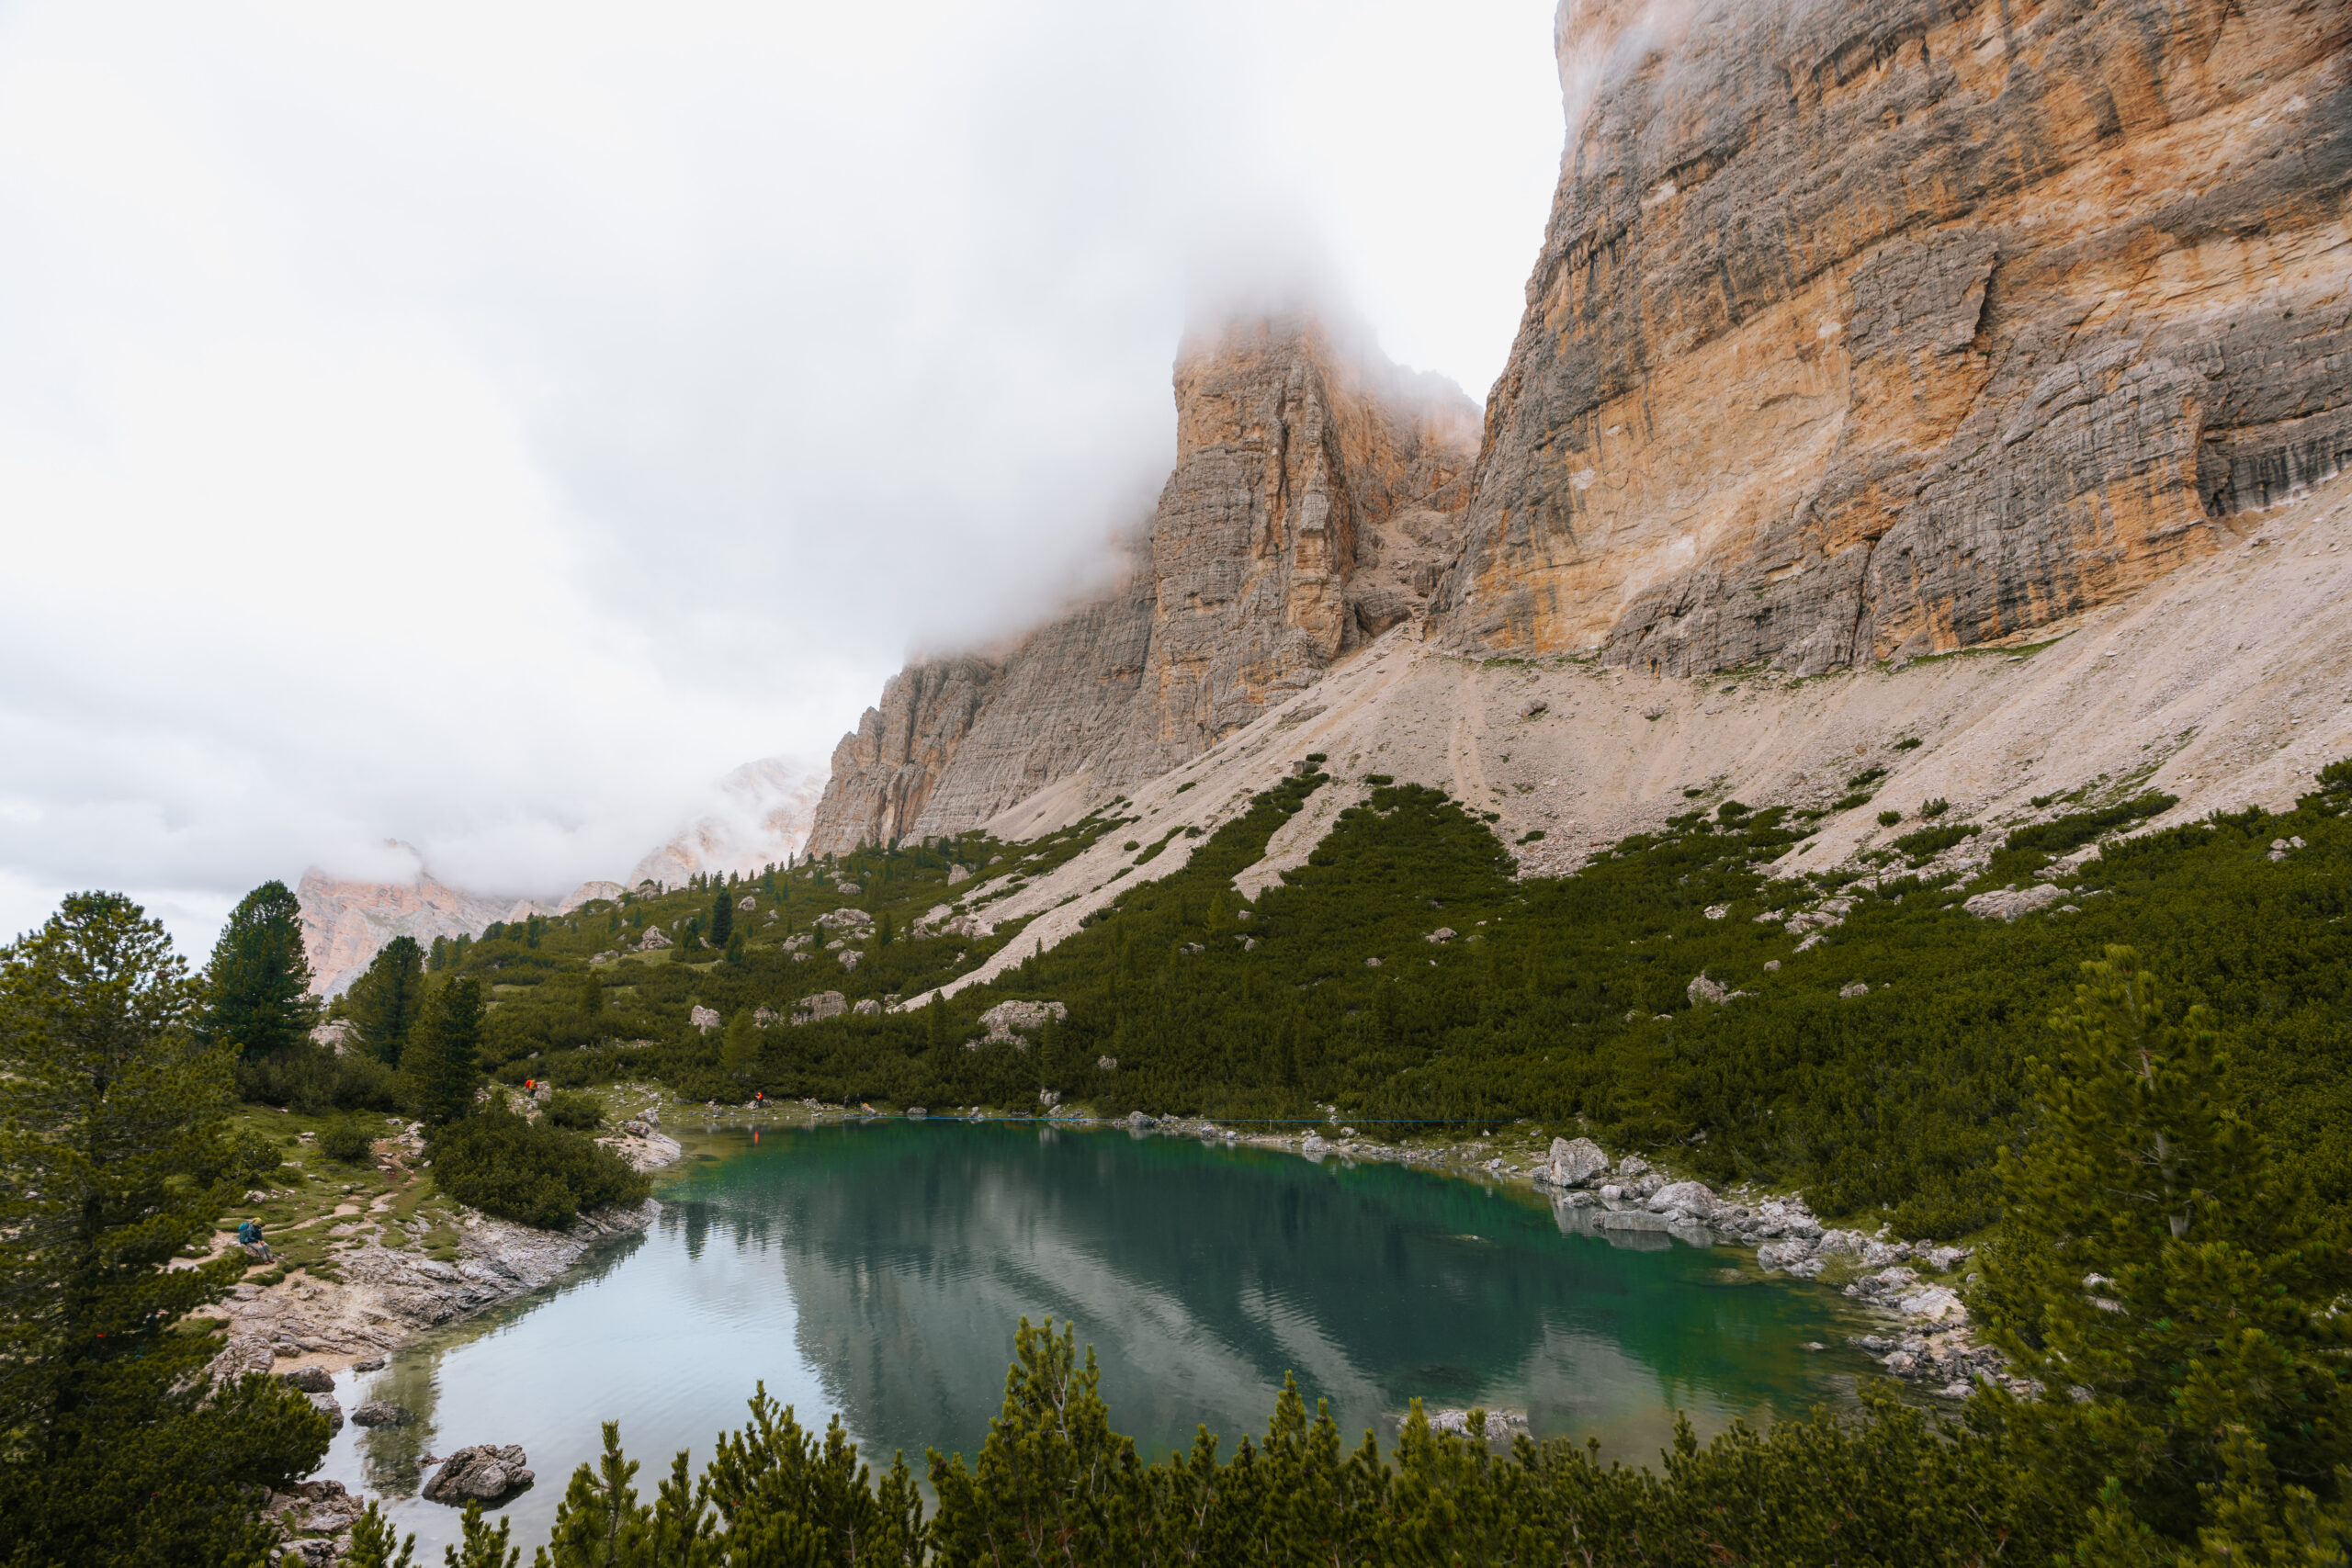
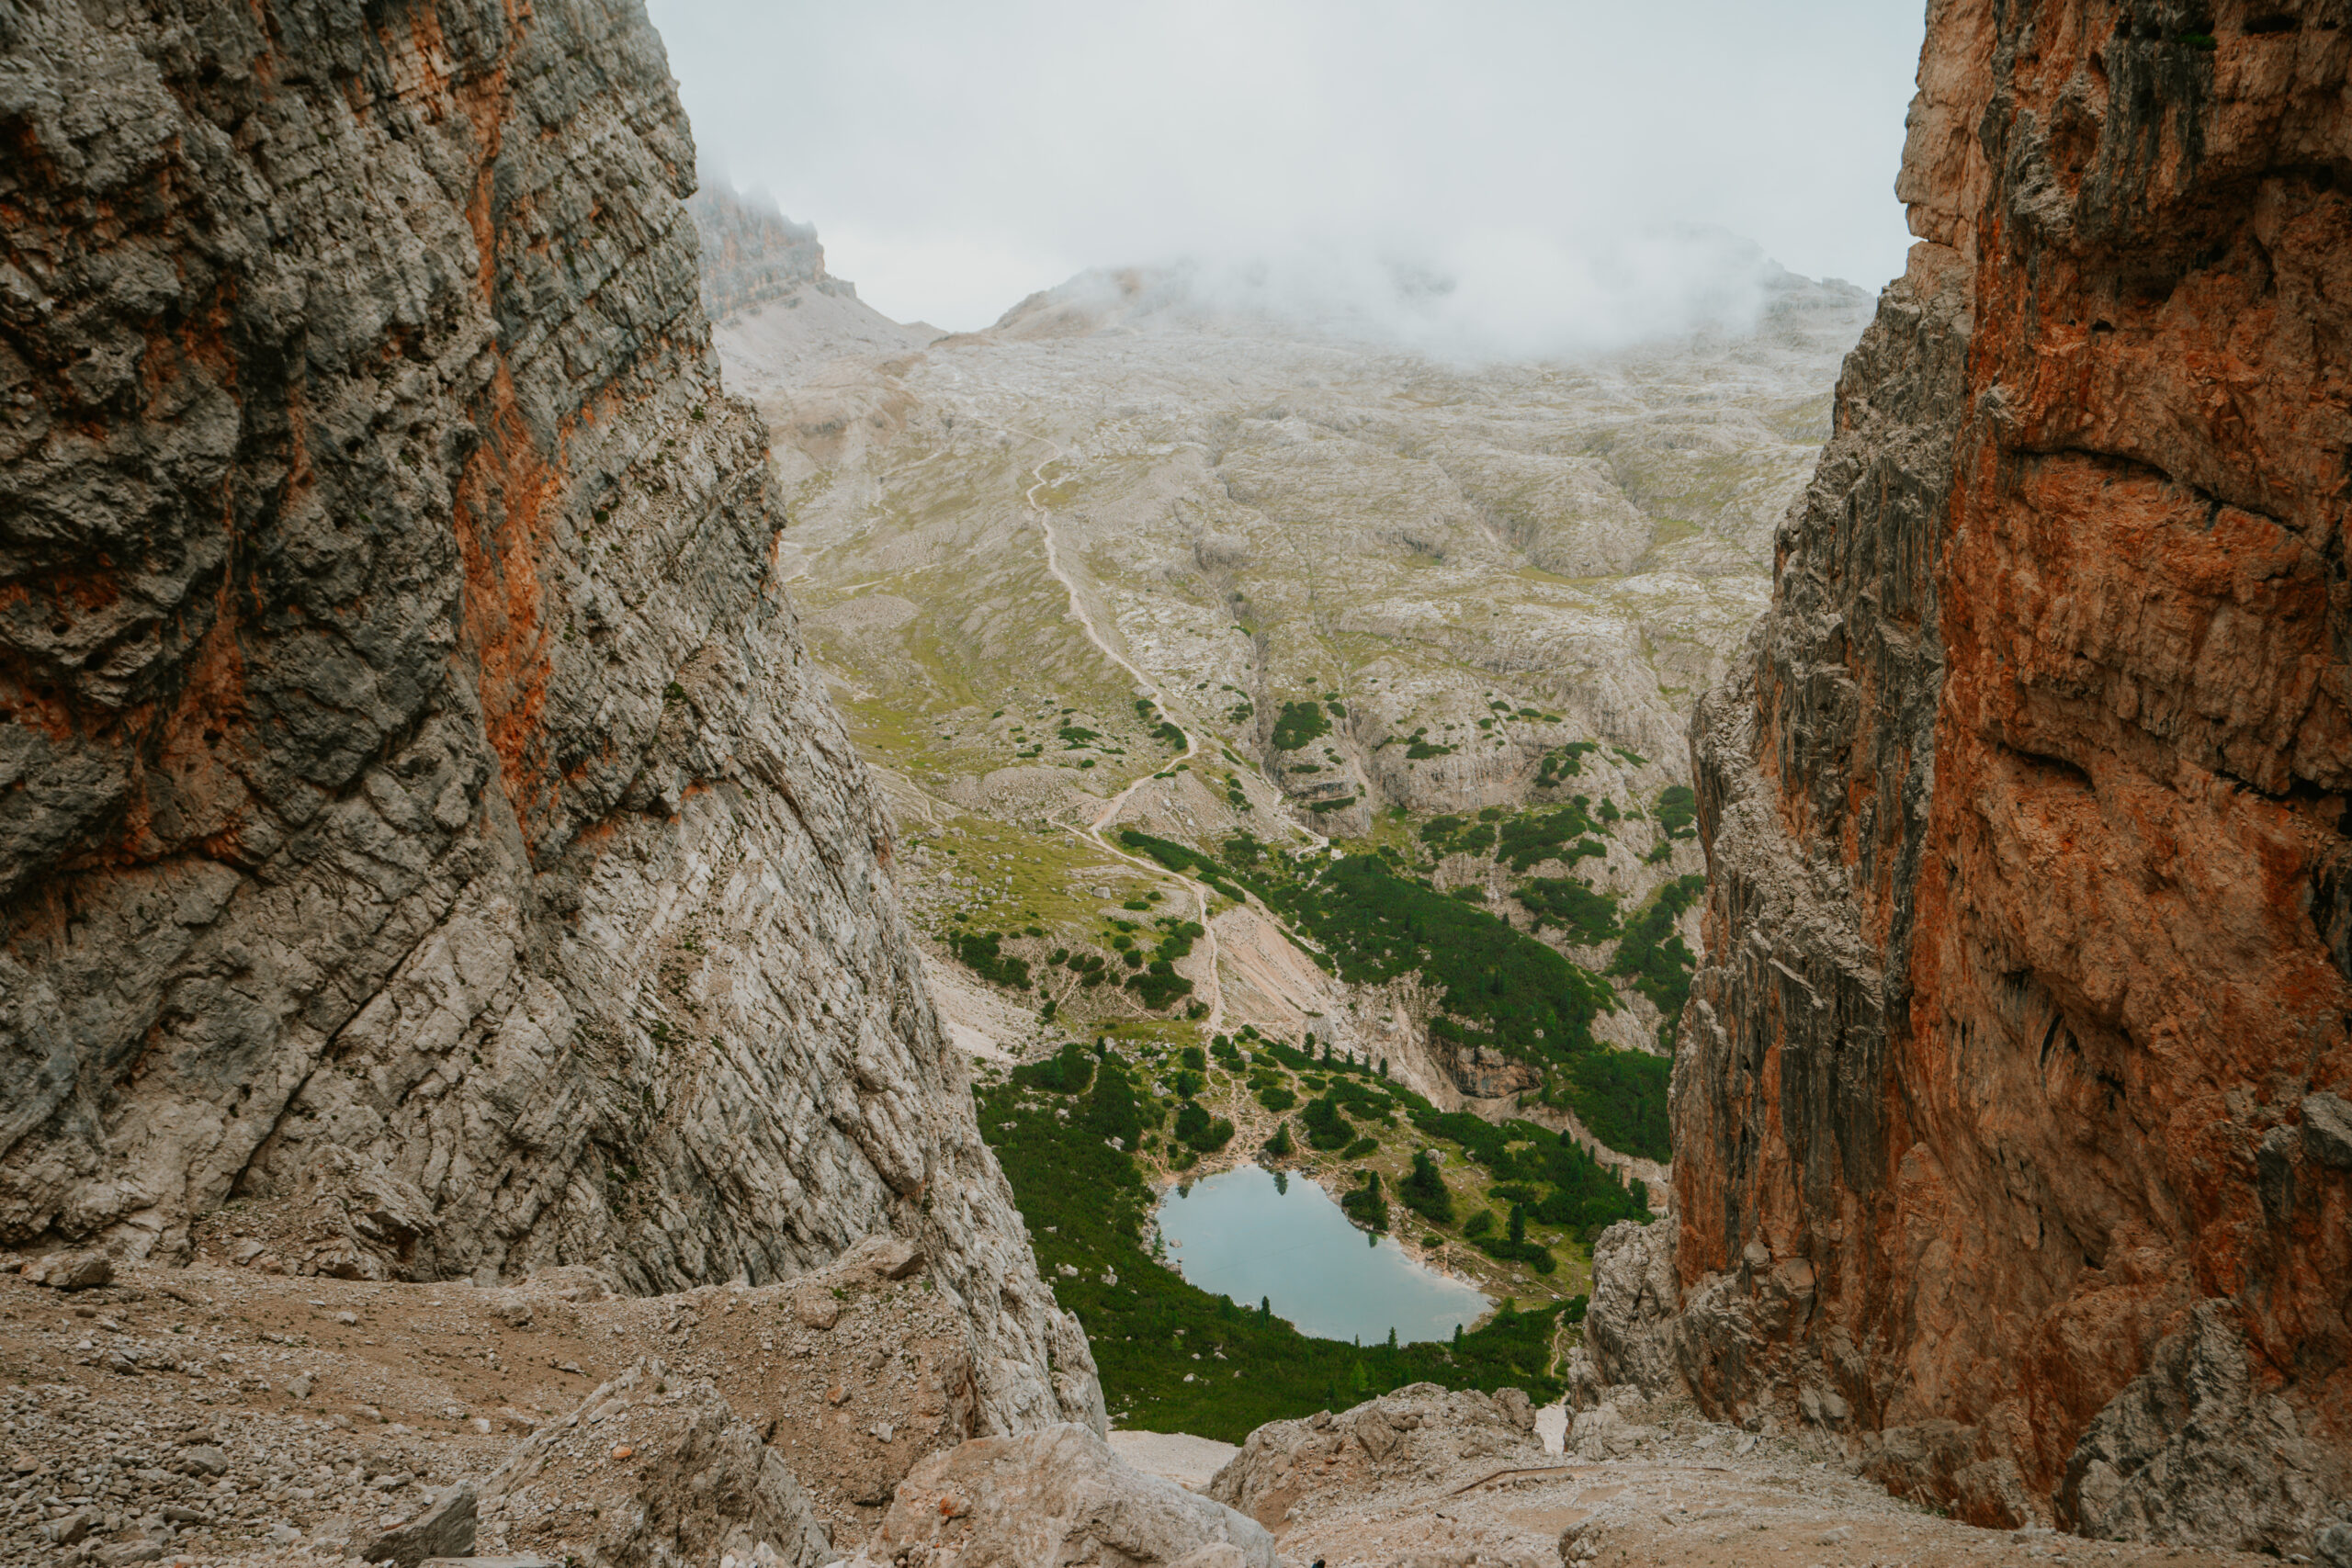
Once over the pass, you will see Piccolo Lagazoui as well as Rifugio Lagazoui if the weather permits. Unfortunately, you will have to go all the way down and then back up to get to the Rifugio. Fortunately, the lake is spectacular, so it’s a great consolation prize.
Traversing the switchbacks made of loose scree down to the lake is straightforward, but please watch your step. I was desperately wishing we had purchased hiking poles during this section because the loose scree forces you to be exceptionally vigilant about where you are stepping.
The trail becomes more popular when you reach Lago di Lagazoui, as this is a well-known day hike. This is also a great place to take lunch if you go with a packed lunch like we did (14 euros for 2 sandwiches, an apple, a muesli bar, and a bottle of water).
To be completely transparent, the hike up to Rifugio Lagazoui from the lake can be pretty daunting. The entire way is uphill, long, and taxing. At this point, it also started to sprinkle, but we soldiered on because we wanted hot chocolate.
The last section up to the Rifugio felt like a never-ending stream of switchbacks and the only reprieve was the World War 1 tunnels that dotted this part of the trail.
Rifugio Lagazoui is large and busy since there is a cable car that brings people up from the valley at Passo Falzarego.
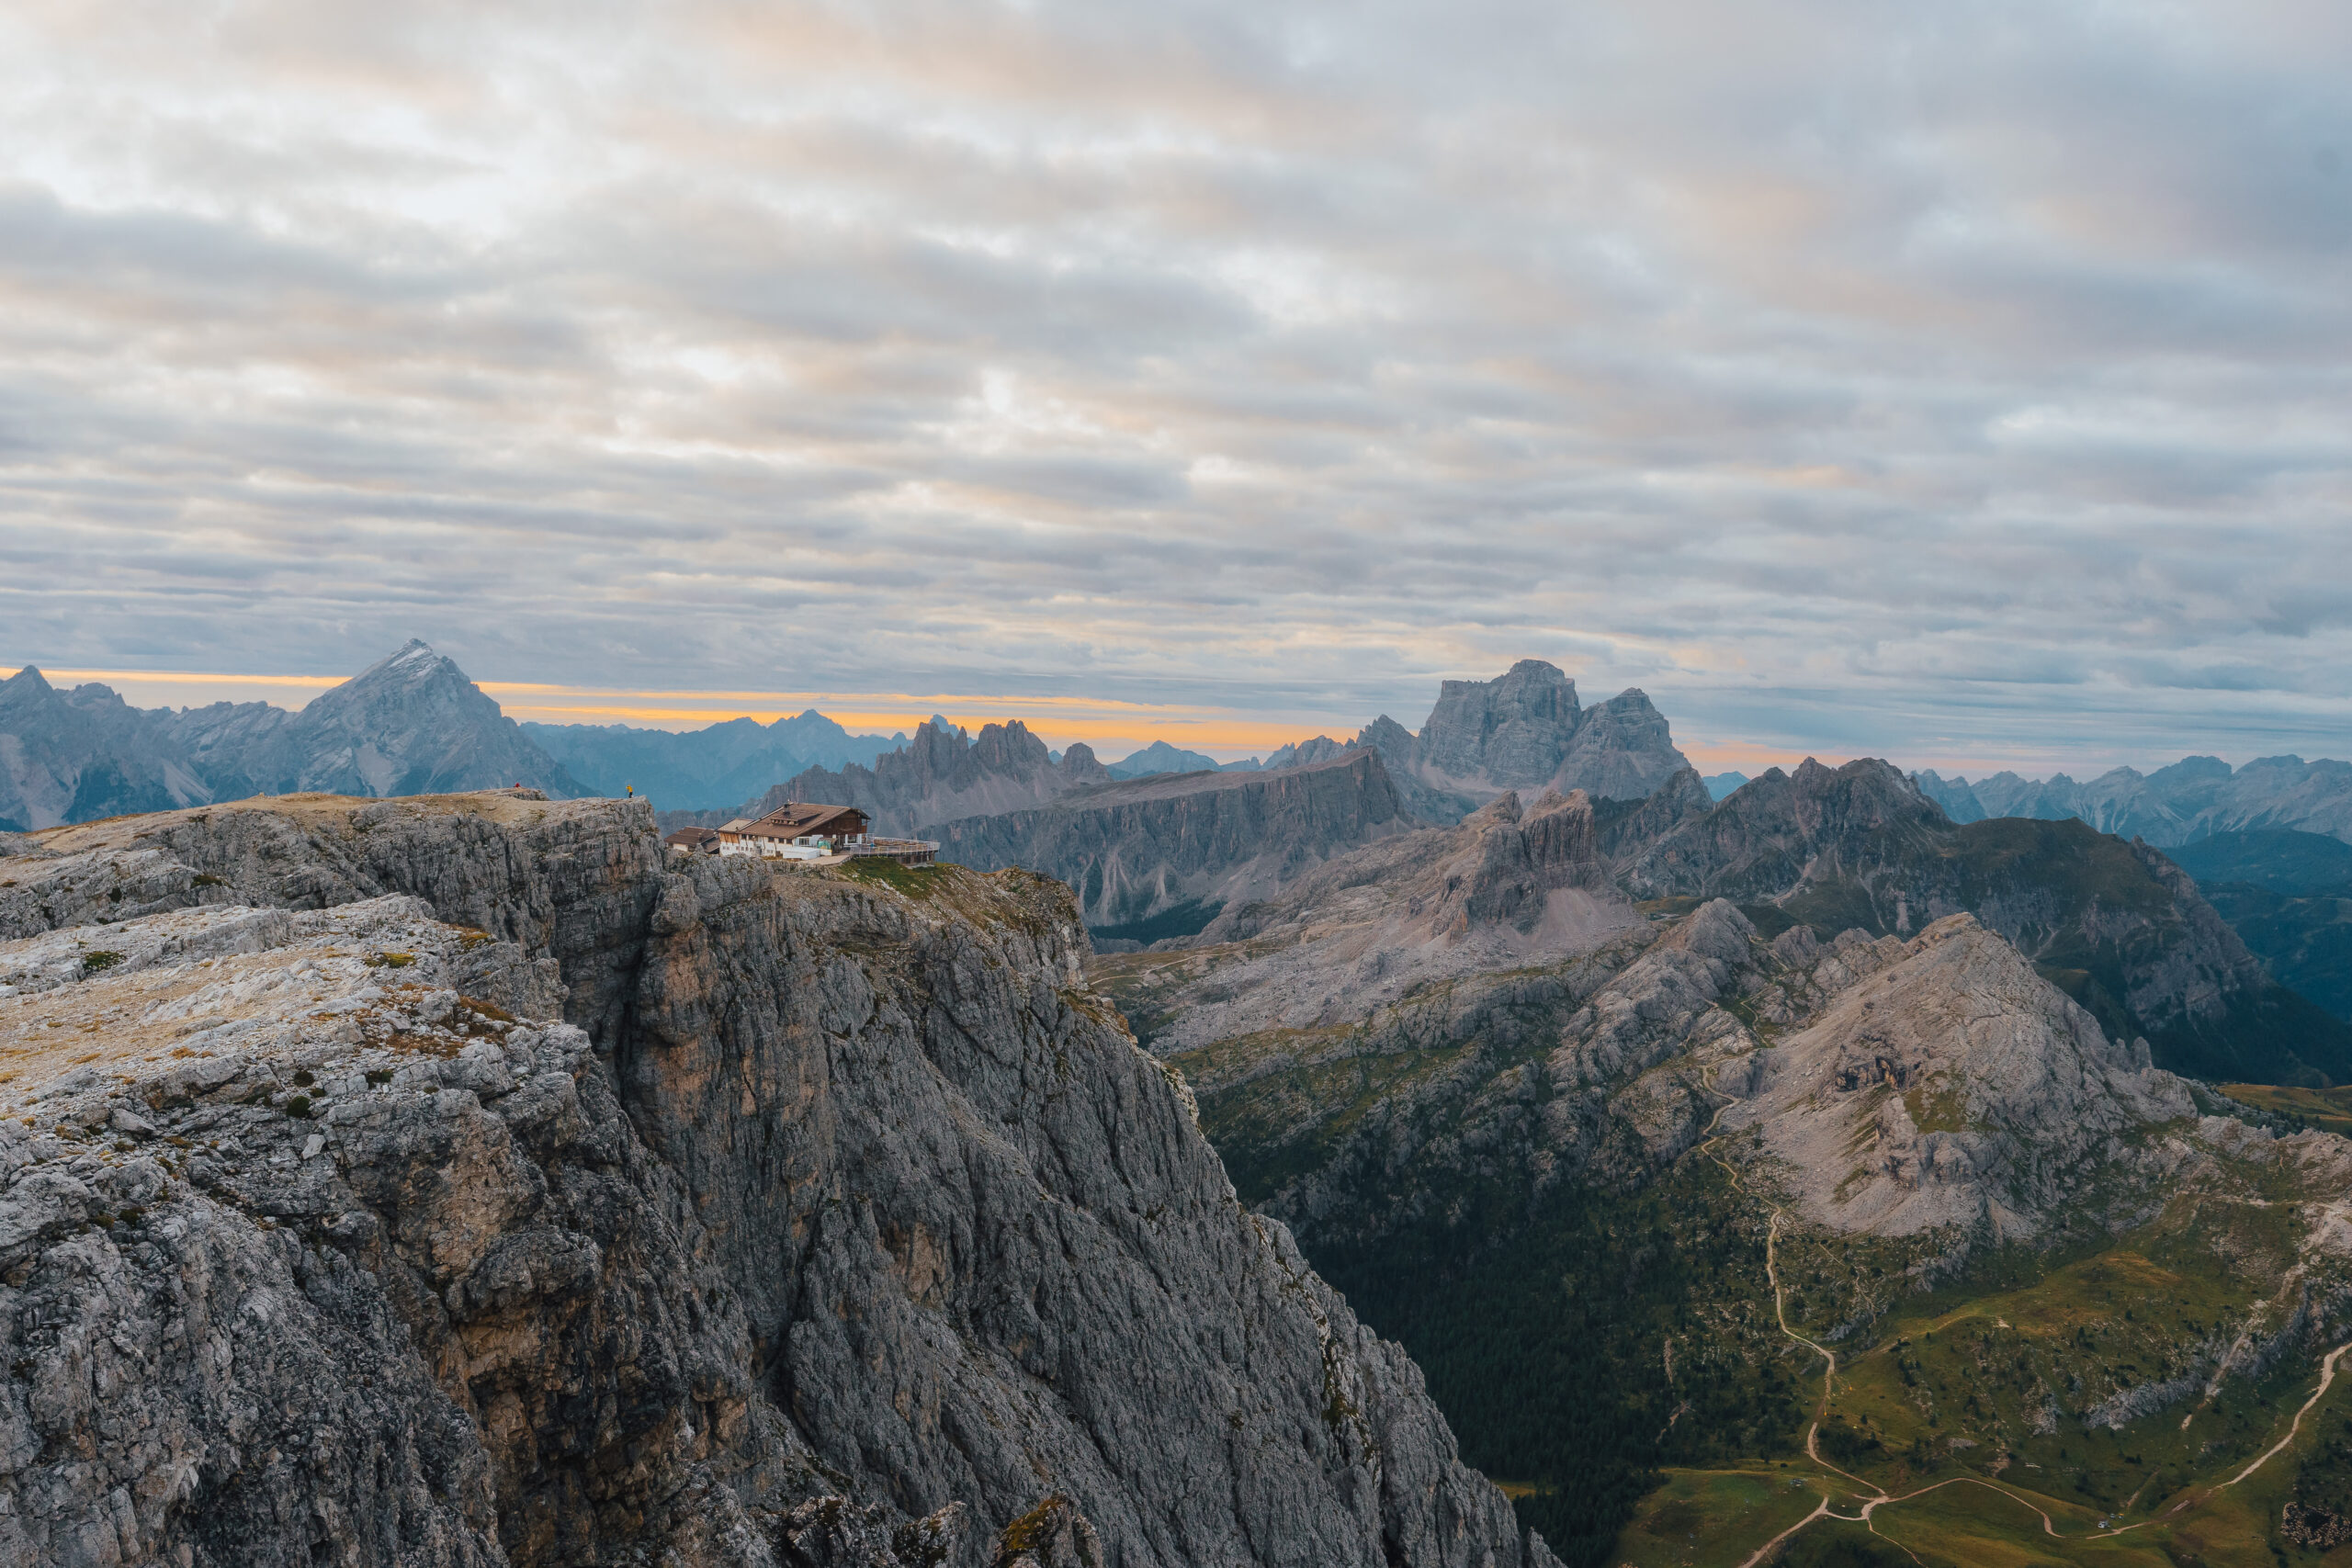
There are dormitories downstairs and private rooms above. This Rifugio has one of the best views on the entire trail, and books up quickly, so make sure to reserve well in advance.
The dinner here is a set 3-course menu unless you let them know ahead of time that you wish to order a la carte. The continental breakfast here was spectacular. This is one of the spendiest Rifugios on the trail, but for good reason.
Rifugio Lagazoui Contact Information
Day 4: Rifugio Lagazoui to Berghotel Passo Giau
Distance: 8 km ( 5 miles)
Time: 5-5.5 hours
Path Numbers: 401, 402, 441, 452
The stats above are for the variant and not for the main AV1 route. Many people choose to do the variant since it significantly shortens the day and allows you to stop at Rifugio Averau and/or Rifugio Nuvolau.
The variant route provides the option of doing the WW1 tunnels. If you choose to do this, it’s highly recommended that you have a helmet and are comfortable with tight, damp spaces.
Neither of us was itching to do the tunnels, so we did the regular trail for the variant down to Passo Falzarego. This small mountain pass has a store and an ATM if you need to pull out money for any reason. You could also take the cable car down, depending on when you leave.
From Passo Falzarego, the hike is mostly steady uphill with incredible views the entire way. There are a few scramble-like sections that are more than doable, but require the use of both hands.
If you time it right, I encourage you to get lunch at Rifugio Averau. Even though the food was a little more expensive compared to other places on the trail, it was easily the best food we had the entire time.
We stayed at Berghotel Passo Giau since both Averau and Nuvolau were completely booked for the date we needed. Honestly, all 3 are great options based on what we saw and experienced.
The route down to the Berghotel is easy if you take the right route. We followed the road but took the first left onto what looked like a trail. Instead, you’ll want to take the second left a little further down to avoid a very sketchy section of the trail. Do not continue on the road as it won’t meet up with the AV1.
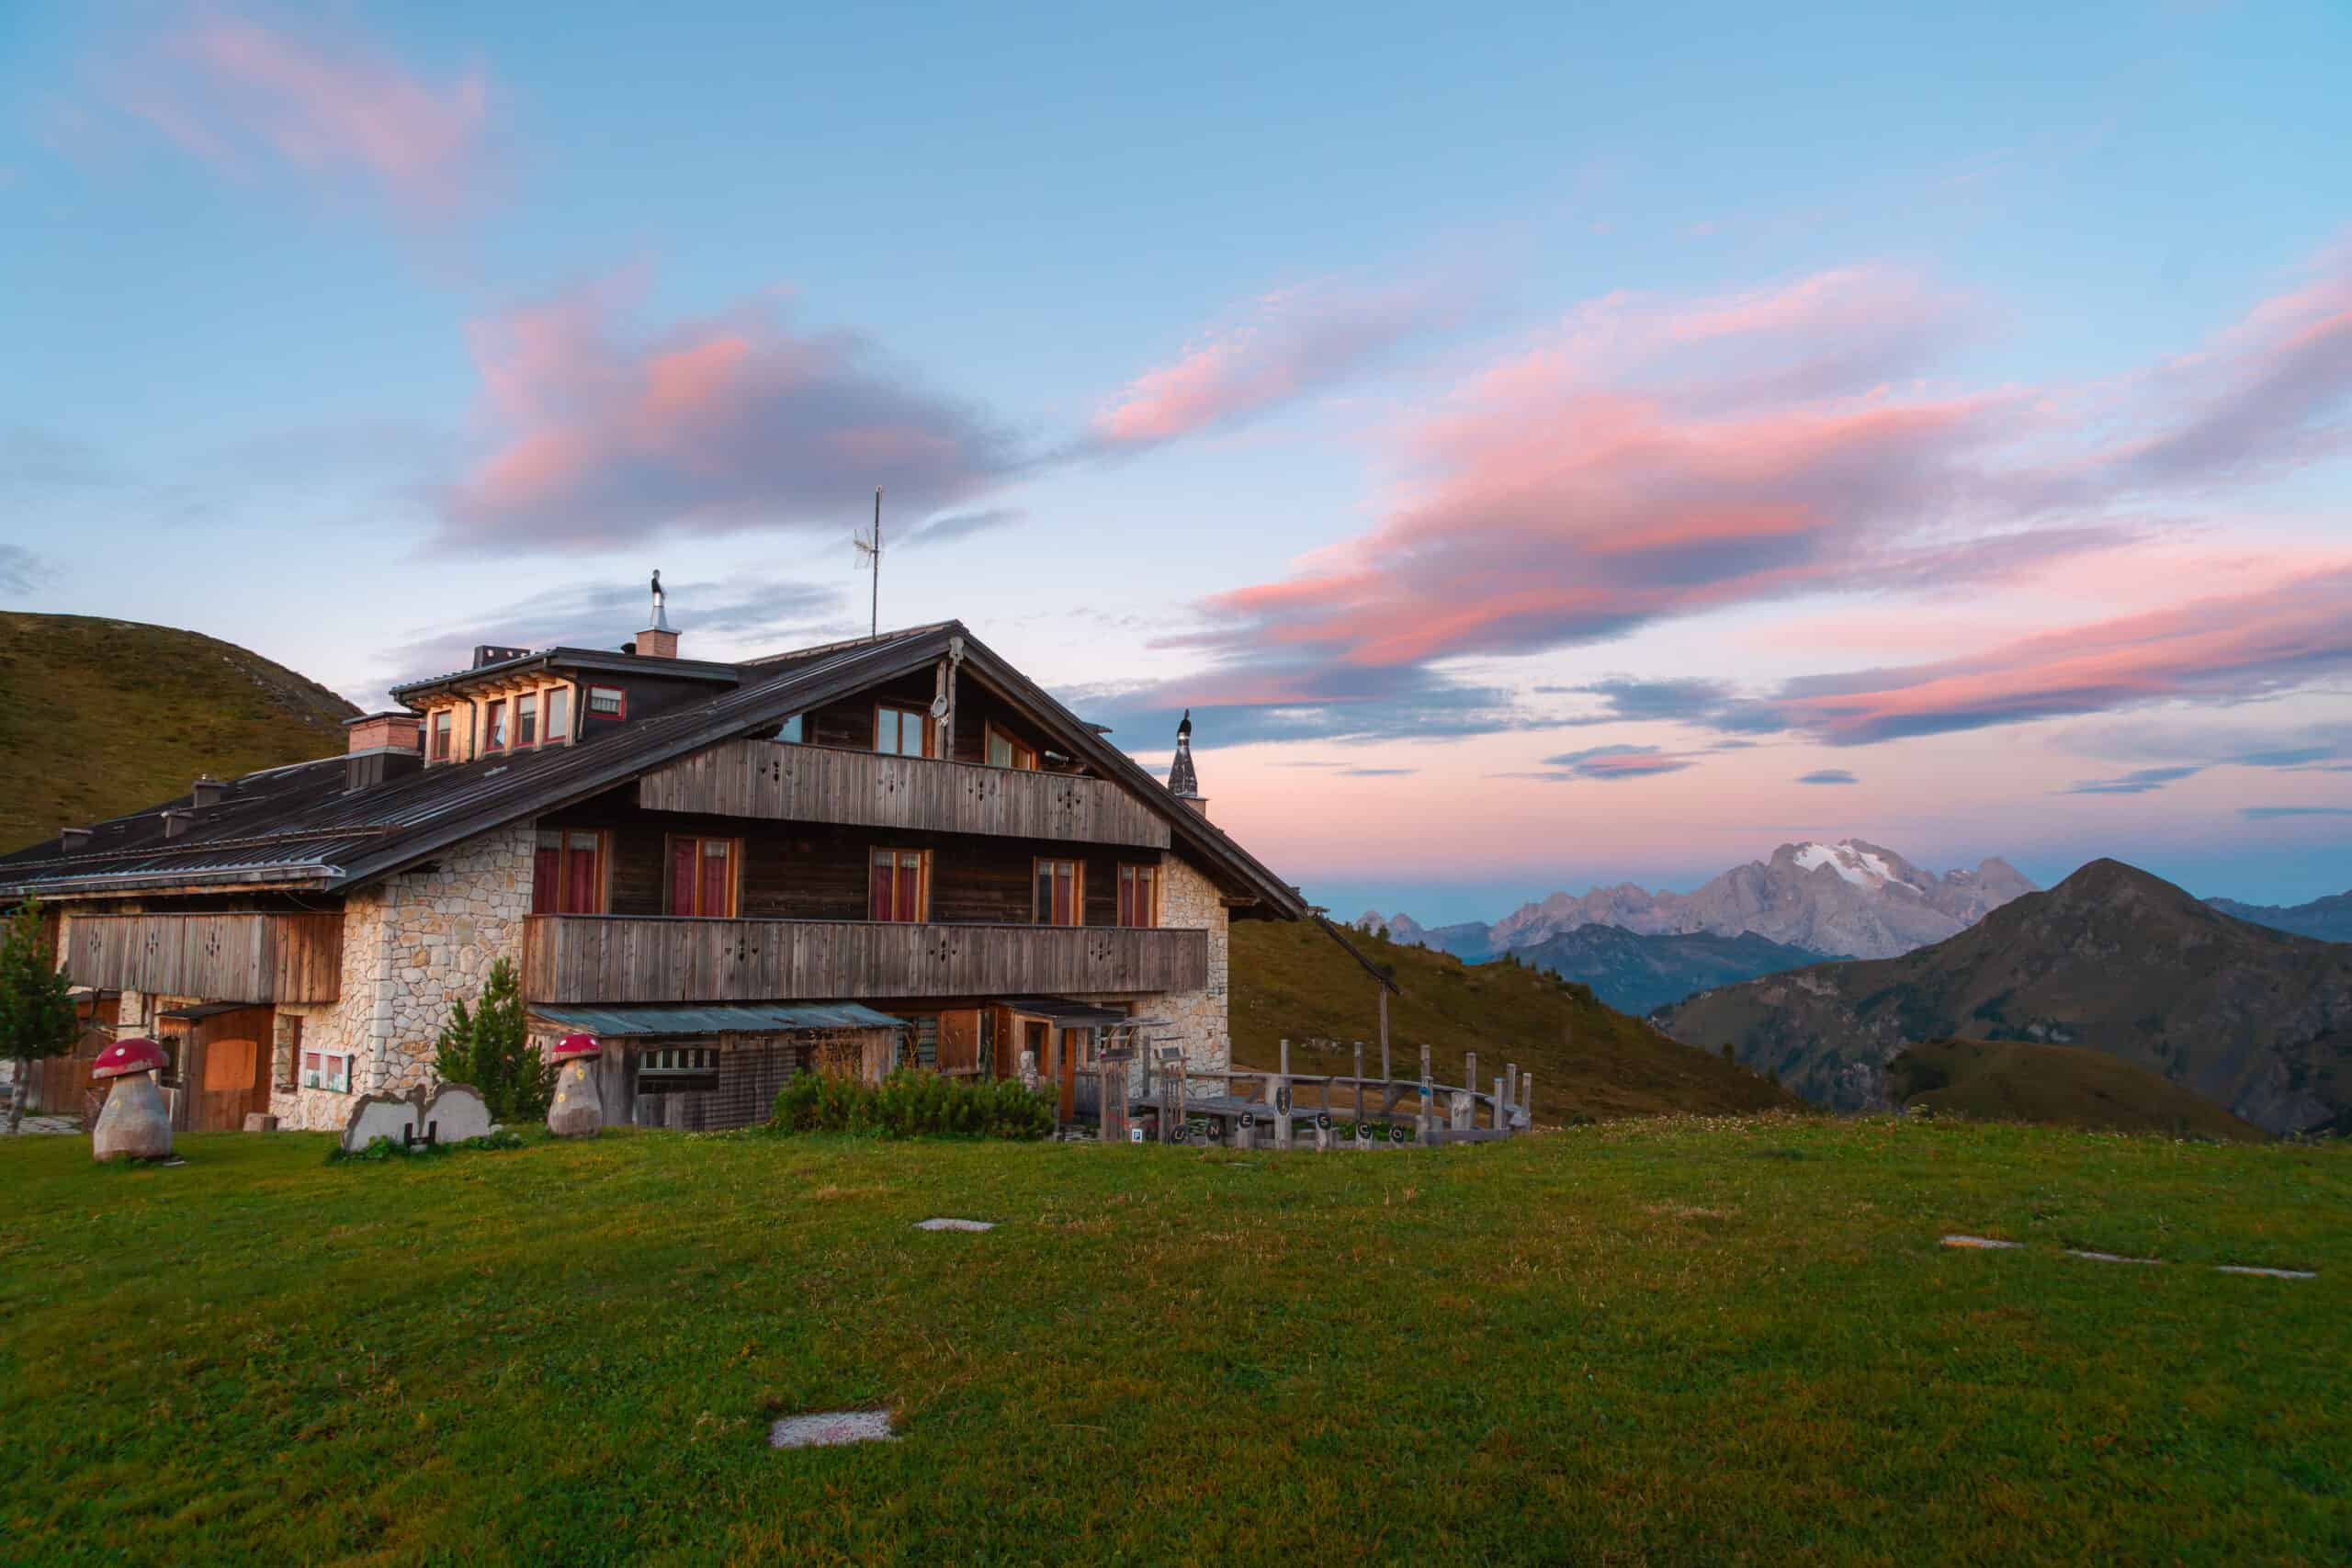
Our stay at Berghotel was my absolute favorite accommodation in terms of comfort and my second favorite for views. Since this is more like a hotel than a Rifugio, we had a private room and bathroom.
The hotel has spectacular views of Passo Giau, and the food was delicious. It is family-owned and we appreciated the service. I will note that the wifi is terrible, but this wasn’t a deal breaker for us since the goal was to disconnect.
Berghotel Passo Giau Contact Information
Day 5: Berghotel Passo Giau to Rifugio Città di Fiume
Distance: 10 km (6.2 miles)
Time: 4-4.5 hours
Path Numbers: 436, 458, 467
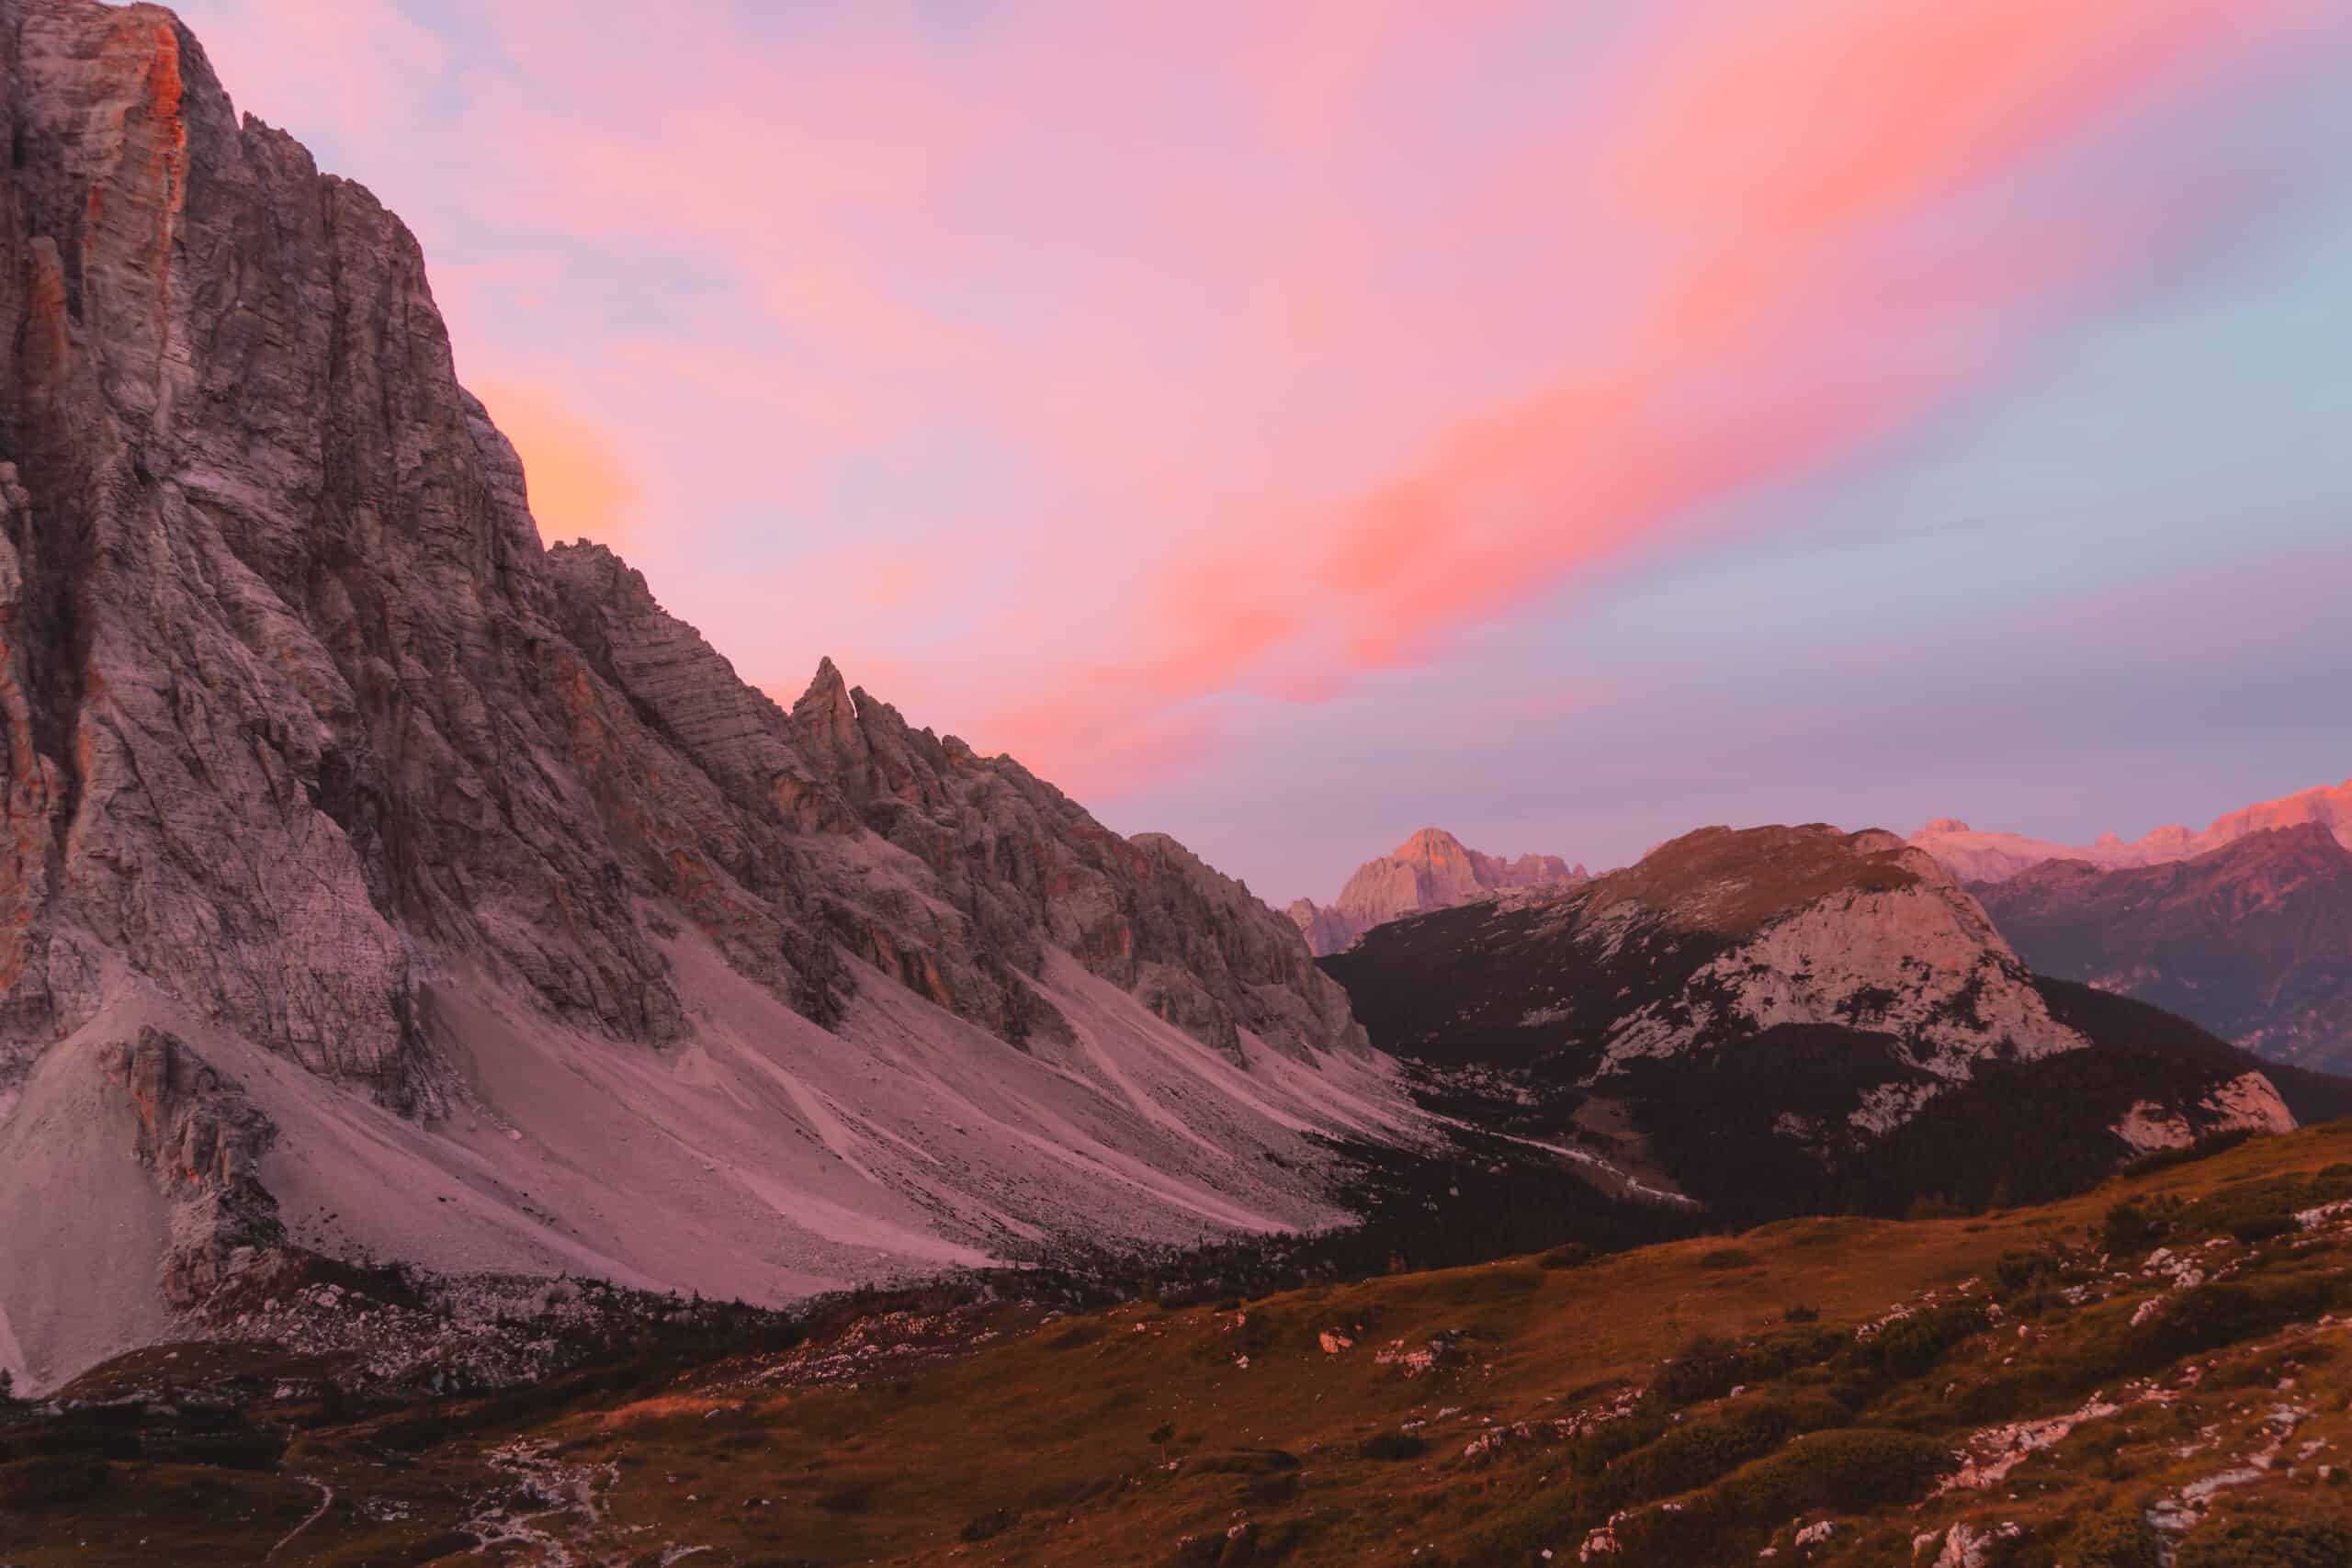
Catching the sunrise at Passo Giau was magical. The clouds in the Italian Dolomites tend to roll in during the afternoon, so sunrise is typically better than sunset.
Breakfast at Berghotel Passo Giau consisted of hard meats, cheese, bread, jam, hard-boiled eggs, croissants, and fruit.
Leaving Passo Giau was bittersweet, but we were excited for another day on the trail.
The hike from Passo Giau to Città di Fiume is relatively easy. There are a few uphill sections, but for the most part, you’ll go through very manageable terrain.
The sole steep ascent for the day is about 45 minutes from Passo Giau. Once at the top of this section, we had a lovely stroll through a meadow where we saw a herd of donkeys as well as a massive herd of sheep.
Approximately 2 miles out from Città di Fiume the trail converges with a gravel road which was nice on the legs after numerous days climbing over rocks.
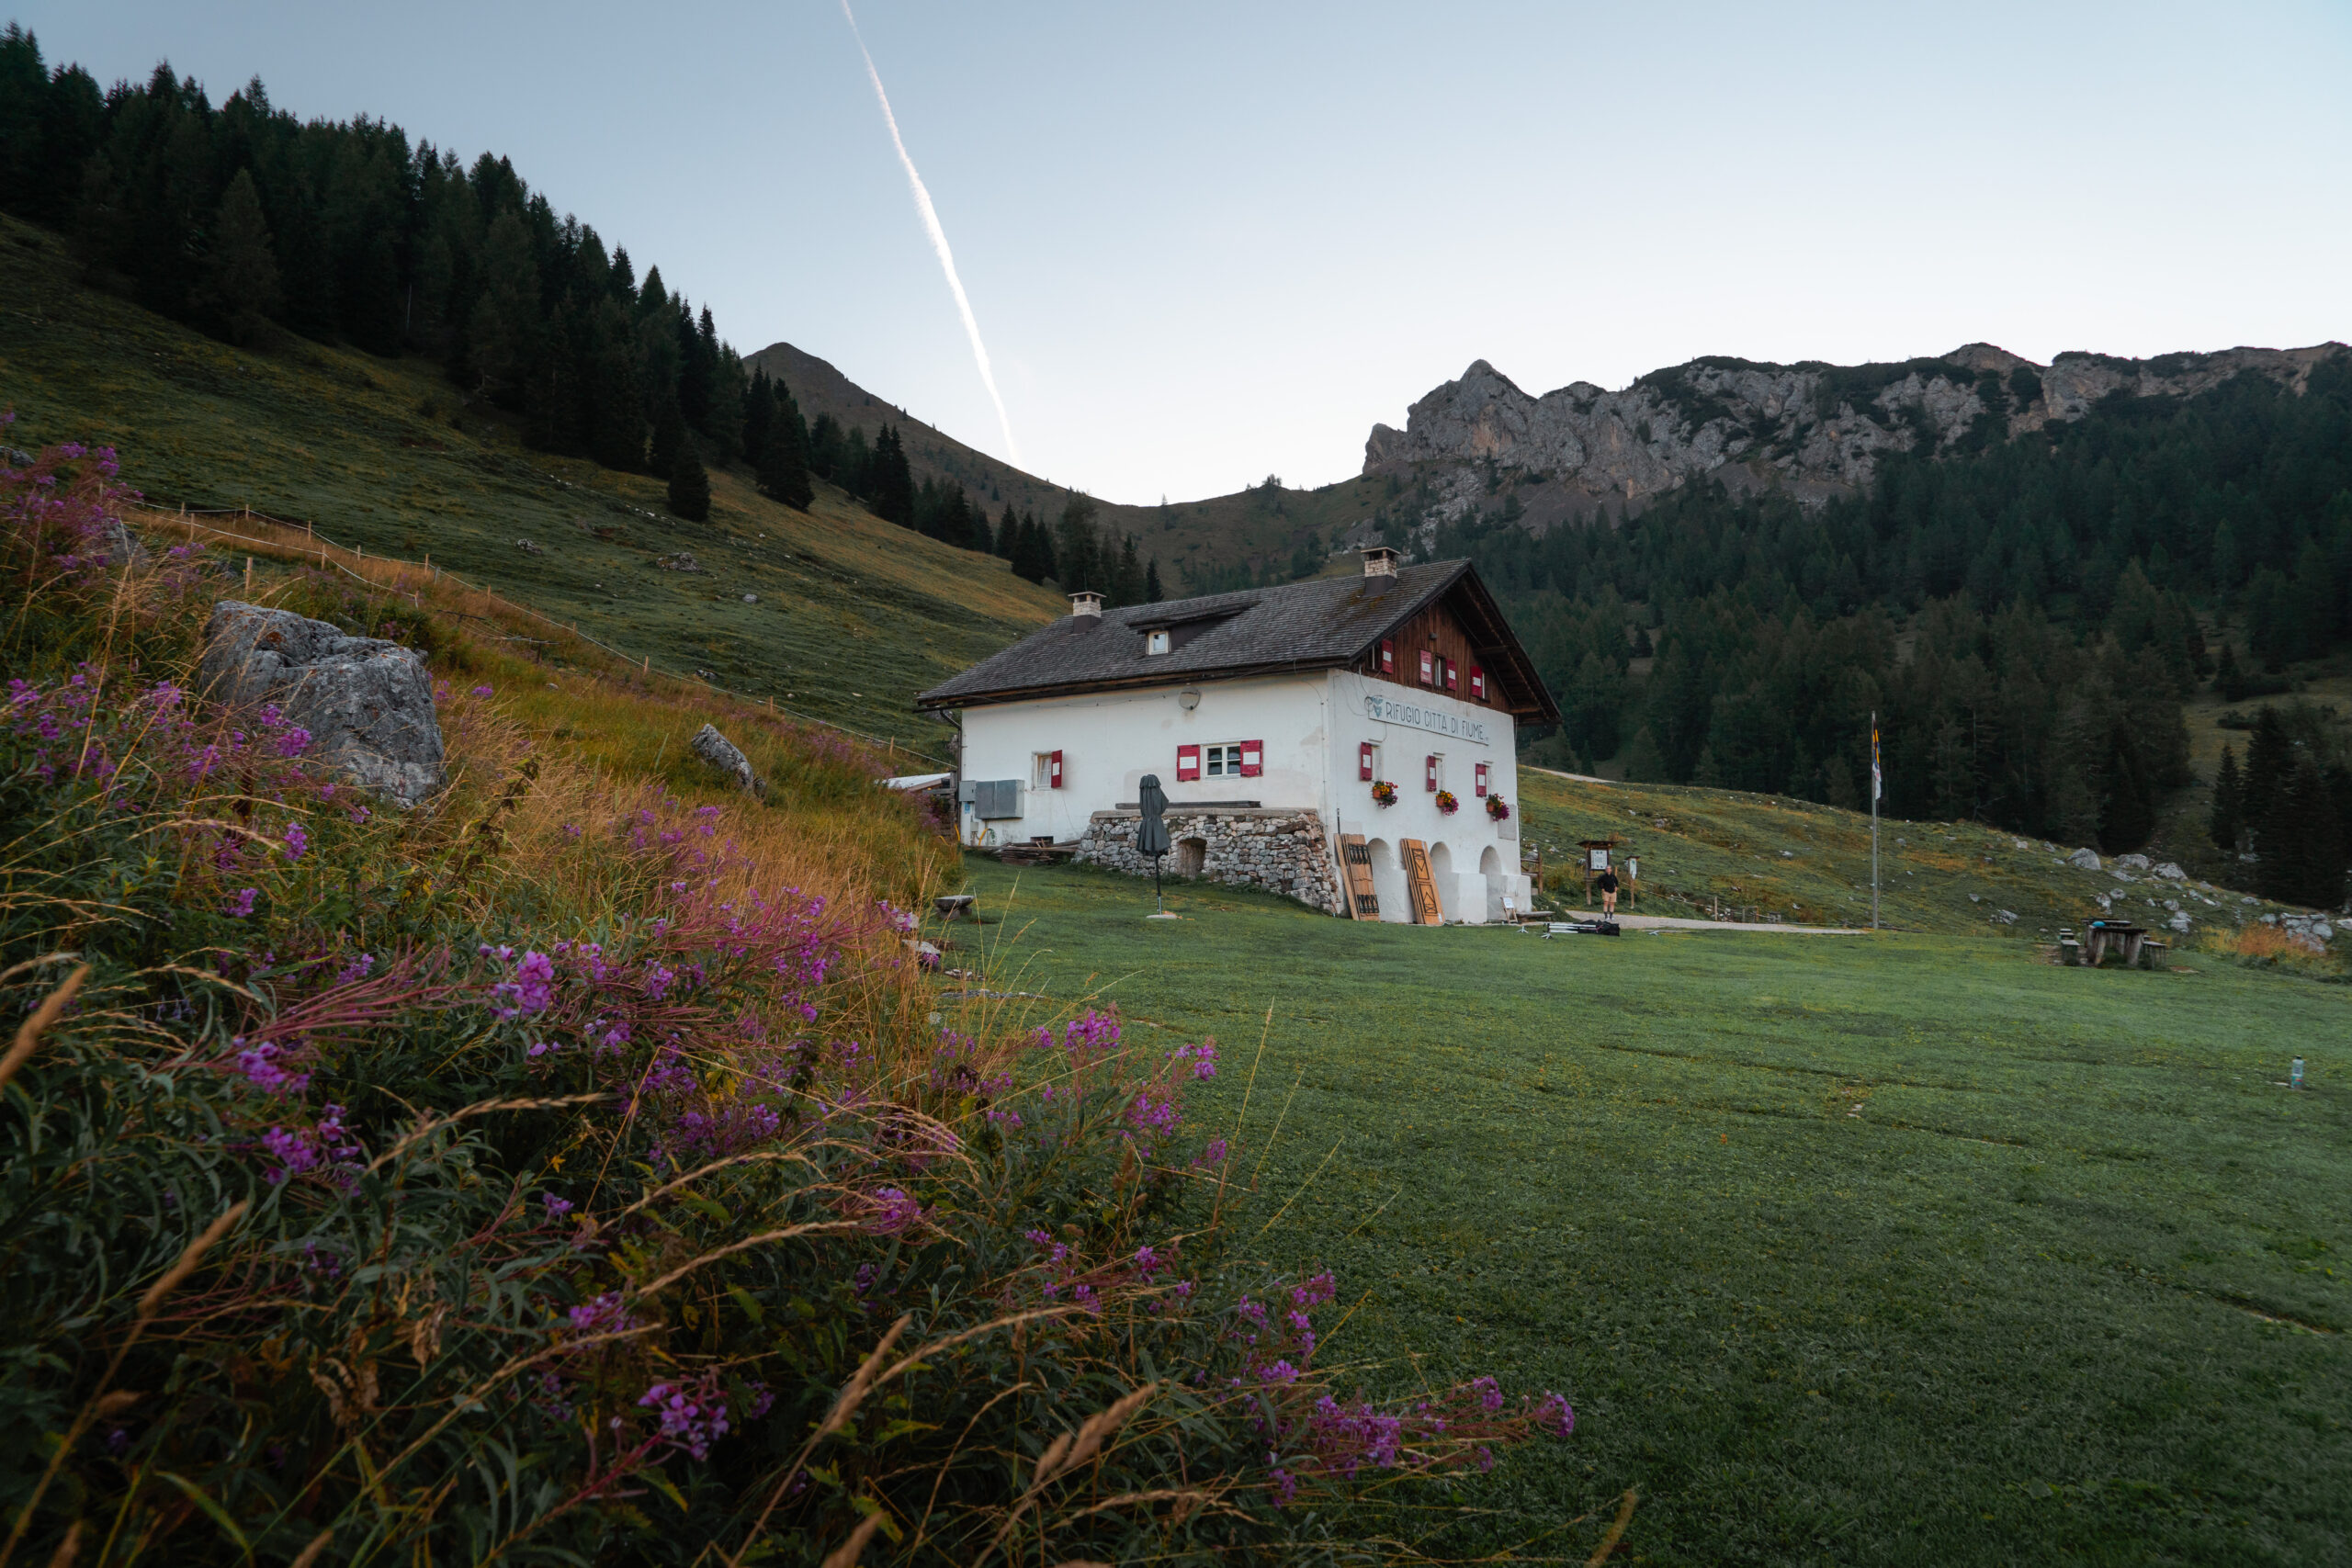
When we rounded the last corner to Città di Fiume the monstrous Monte Pelmo came into view. Monte Pelmo is a goliath and a sight to behold.
We were happy to be done rather early and had a delicious lunch of gnocchi, cheese, beans, and polenta. Afterward, we lounged on the lawn and enjoyed the beautiful day.
The dorms were about 5 people in a room, and we ended up making friends with the German couple that was sharing with us.
This is a smaller Rifugio, but I thoroughly enjoyed our time here. The service was great, the beer was cheap, and the location was ideal.
Rifugio Città di Fiume Contact Information
Day 6: Rifugio Città di Fiume to Rifugio Palafavera
Distance: 9 km (5.6 miles)
Time: 3-4 hours
Path Numbers: 472, 474 (extra variant to Orme Dinosauri)
This day was by far the easiest for us. Originally, we booked Rifugio Venezia before we realized that the trail to this Rifugio is marked as a difficult mountain trail. Unless you are a highly experienced hiker and have a “head for heights”, I do not recommend it.
Once we realized our mistake, we quickly searched for a backup and found Rifugio Palafavera.
The first section of the trail to Rifugio Stalanzo was through woods and over some rock scree. We made great timing, so we decided to take the route to Orme Dinosauri to see some of the only dinosaur fossils found in Italy.
At the split to see the fossils, the trail immediately became steep. Although it was a decent ascent, it only lasted about 30 minutes and wasn’t nearly as demanding as some of the other sections we’d already tackled.
The view at the top of the fossils is incredible and well worth the extra hour it will add if you choose to do this route.
Almost the entire trail to Rigufio Palafavera from Orme Dinosauri is downhill. It’s not terrible, but there are a lot of options, and sometimes the trail isn’t as obvious since this isn’t the main AV1. We didn’t have any real trouble finding our way, but make sure to pay attention if you do this variant.
Rifugio Palafavera is more like a hotel than a true Rifugio. The room is exceptionally comfortable with a private bathroom and balcony.
There’s a mini-mart across the road that has the basics if you need a quick snack.
Rifugio Palafavera Contact Information
Day 7: Rifugio Palafavera to Rifugio Tissi

Distance: 9 km (5.6 miles)
Time: 4-5 hours
Path Numbers: 564, 556, 560
I think this is one of the best days on the trail. The route up to Rifugio Coldai is difficult, but overall not any more demanding than other sections on the trail.
This is a very popular day hike, so if you can plan to time this for the middle of the week, I would highly recommend it! We unfortunately did this on a Sunday, and there were a ton of people on the trail.
Thankfully, it didn’t distract from the overall experience, and we loved grabbing lunch at Rifugio Coldai.
The real attraction on this leg of the trail is Lago Di Coldai. The lake is stunning,g and this is a great spot to spend an hour or two enjoying the weather and dipping your toes in.
We read by the lakeshore for about 2 hours and then finished the last two miles of our hike to Rifugio Tissi well before dinner time.
There are some false trails in this section, and signs telling you which direction to go. Make sure to follow the signs, as the false trails look like they are shortcuts, but eventually just disappear completely and can leave you in a dangerous position.
Rifugio Tissi was probably my favorite Rifugio for views. The 360-degree views are spectacular during a sunrise or sunset. The food was also pretty good, and I loved the outdoor deck for enjoying a beer and a snack.
This Rifugio does not have wifi, but there are showers you can make use of.
Rifugio Tissi Contact Information
Day 8: Rifugio Tissi to Rifugio Carestiato
Distance: 14.2 km (8.8 miles)
Time: 5-6 hours
Path Numbers: 563, 560, 555, 554, 549
Even though this isn’t the longest day on the trail when solely looking at mileage, I felt like it was the hardest. If you choose this route, just make sure to leave relatively early to give yourself ample time.
One thing I wish we had done this day was request a packed lunch. Due to the distance, we got quite hungry before getting lunch at Rifugio Carestiato.
My recommendation would be to get one packed lunch for two people as a snack and then get a full lunch when you get to Carestiato.
The hike from Rifugio Tissi to Rifugio Vazzoler is all downhill. Once you get past Vazzoler, you will hike for another 1.5 miles or so on a road before you meet a split where the trail picks back up from the road.
Pay attention during this section so you don’t miss the split! A couple missed this split-off and ended up adding numerous miles to an already challenging day.
The hike from this point on until you reach Rifugio Carestiato is long and mostly uphill. None of it is particularly challenging, but if the sun is out, you will have a lot of exposure.
This area has a lot of rock scrambling sections and boulders, which is another reason why I highly recommend getting hiking poles.
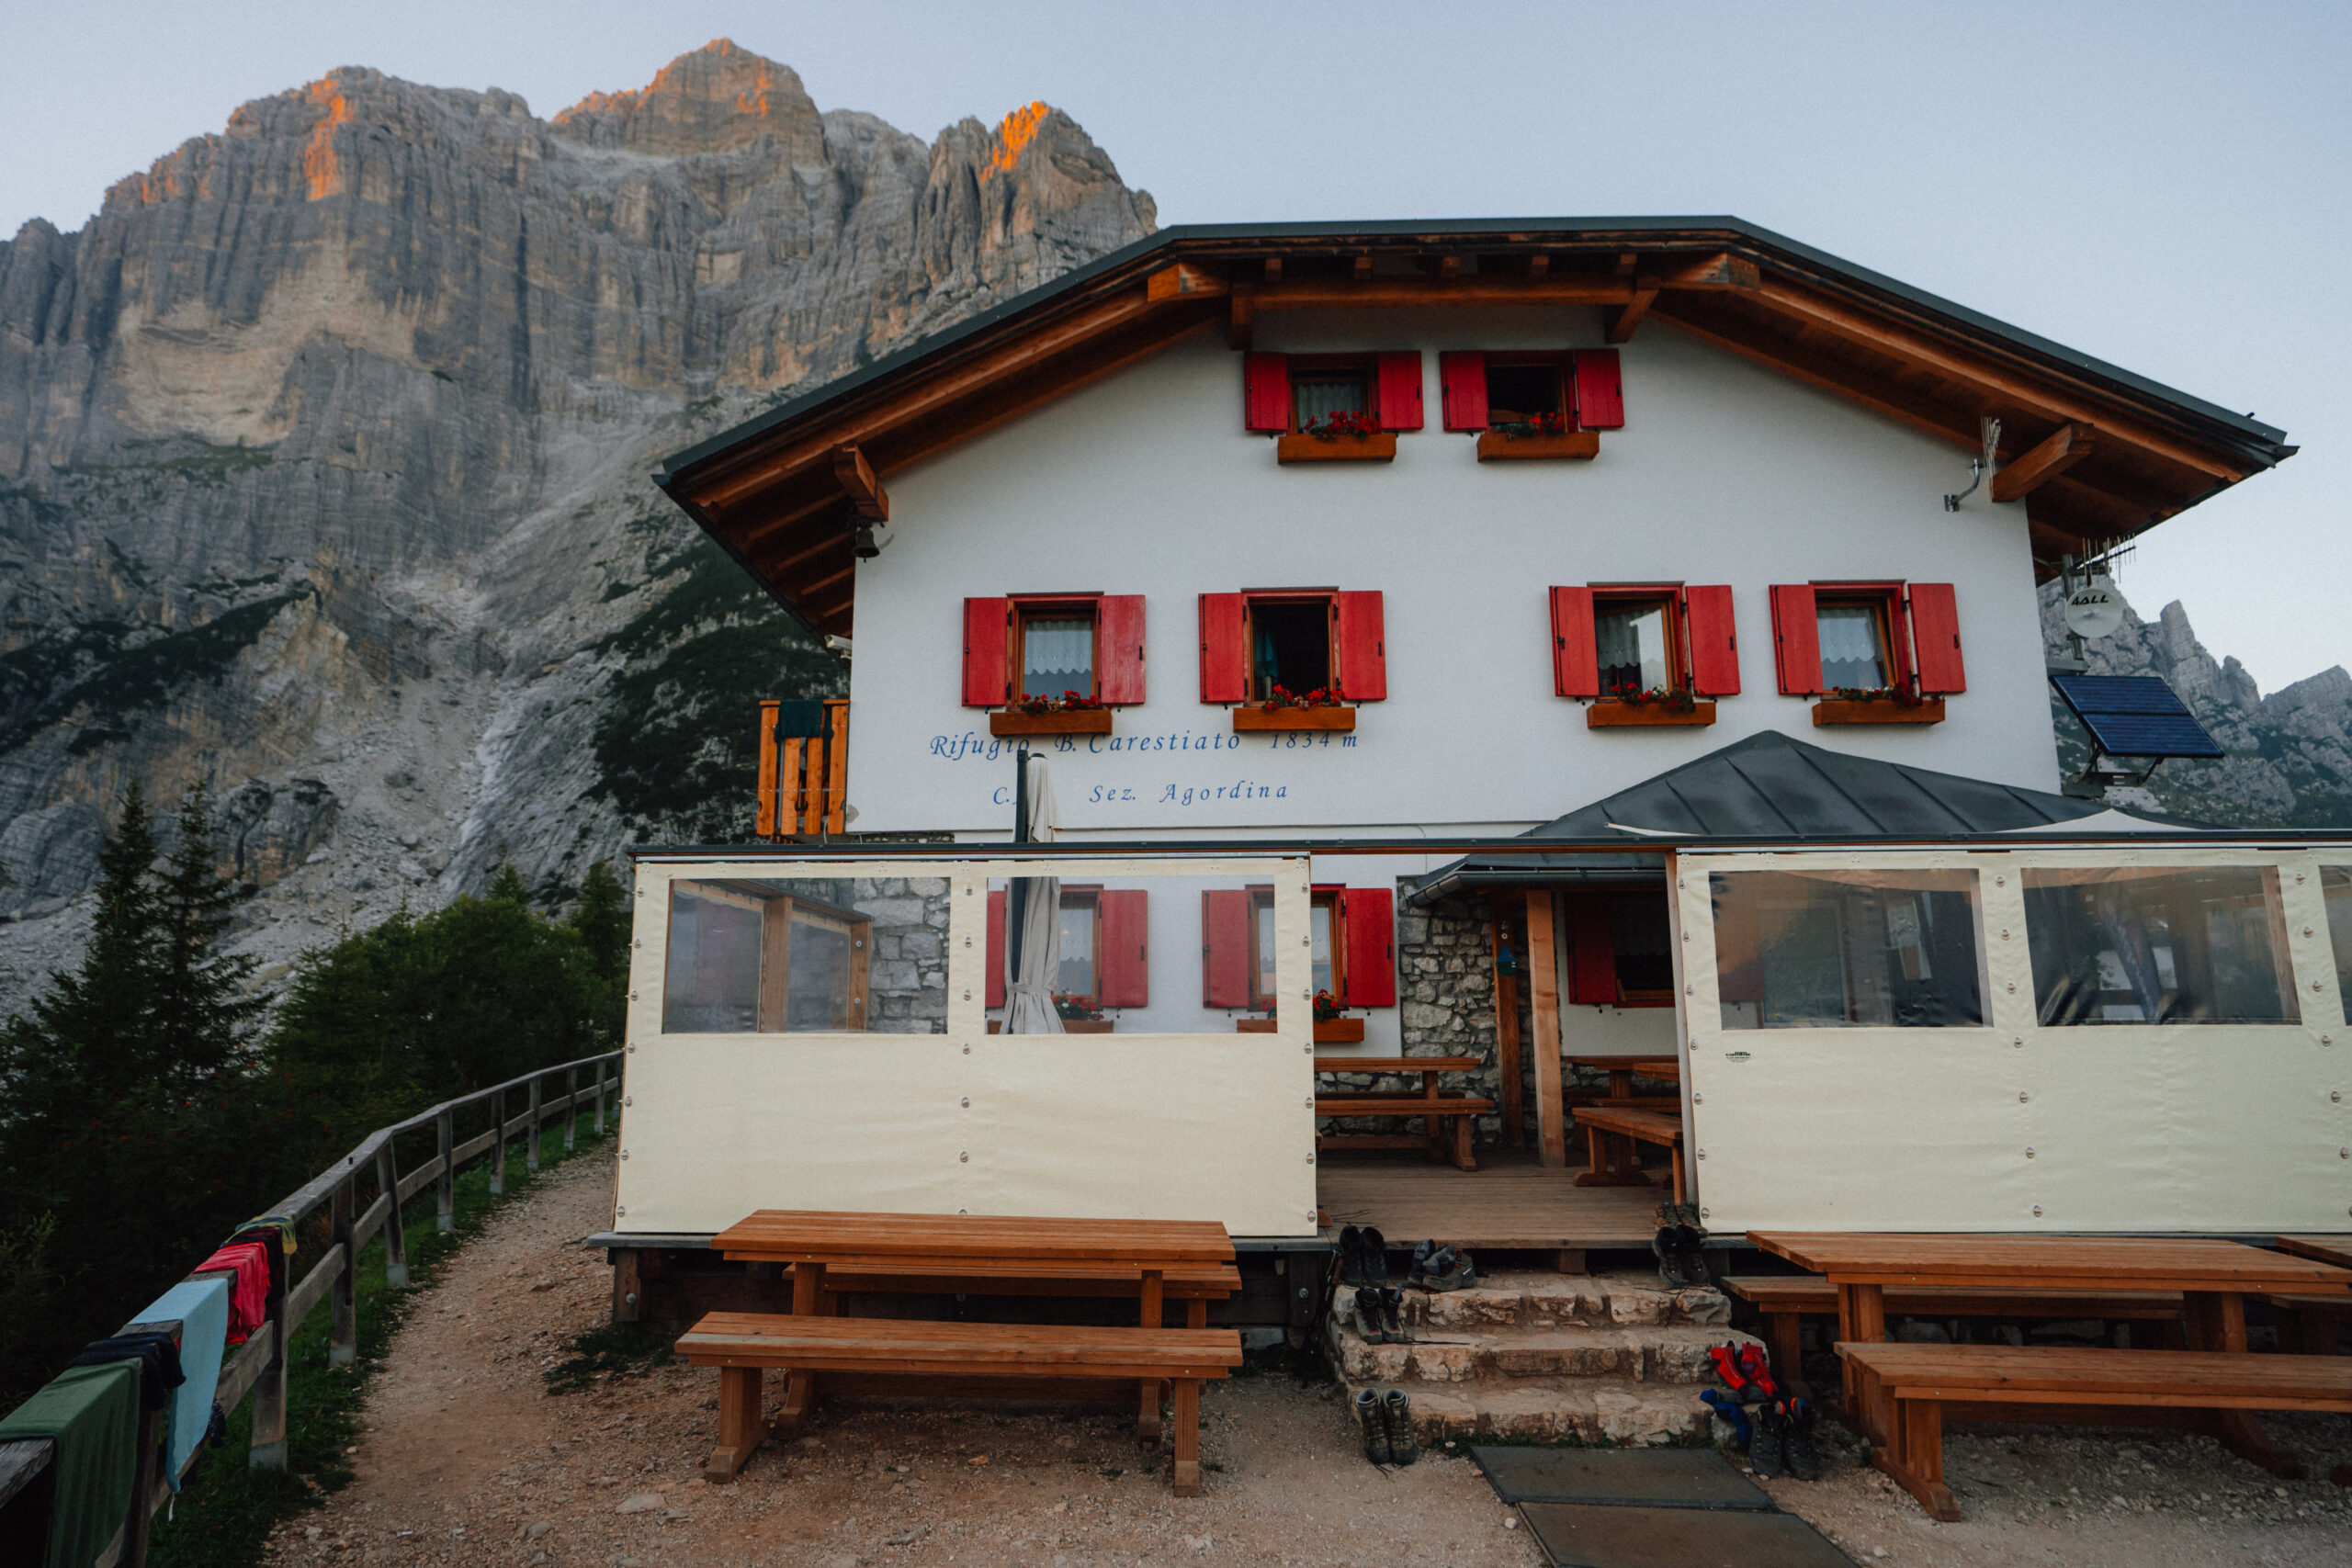
Rifugio Carestiato is a nice accommodation with great food and really friendly staff. It was renovated not too long ago, so the rooms are updated.
There are hot showers here, which I heard were amazing, but I unfortunately got a cold one. I found out after the fact that I could have asked them to fix it, but I had already had a cold shower.
If this happens to you, go ask the staff to help you out so you don’t freeze your butt off like I did!
Rifugio Carestiato Contact Information
Day 9: Rifugio Carestiato to Rifugio Pramperet
Distance: 13 km (8.1 miles)
Time: 4.5 hours
Path Numbers: 549, 543
Even though this was approximately the same distance as the day before, I felt like the terrain was much more manageable. The first section is downhill, and then you do about 1.5 miles along the road before heading into the forest.
I can’t comment on the views for this section since it was foggy and cloudy most of the day for us. We got a packed lunch for the day, which meant we could take things at our own pace.
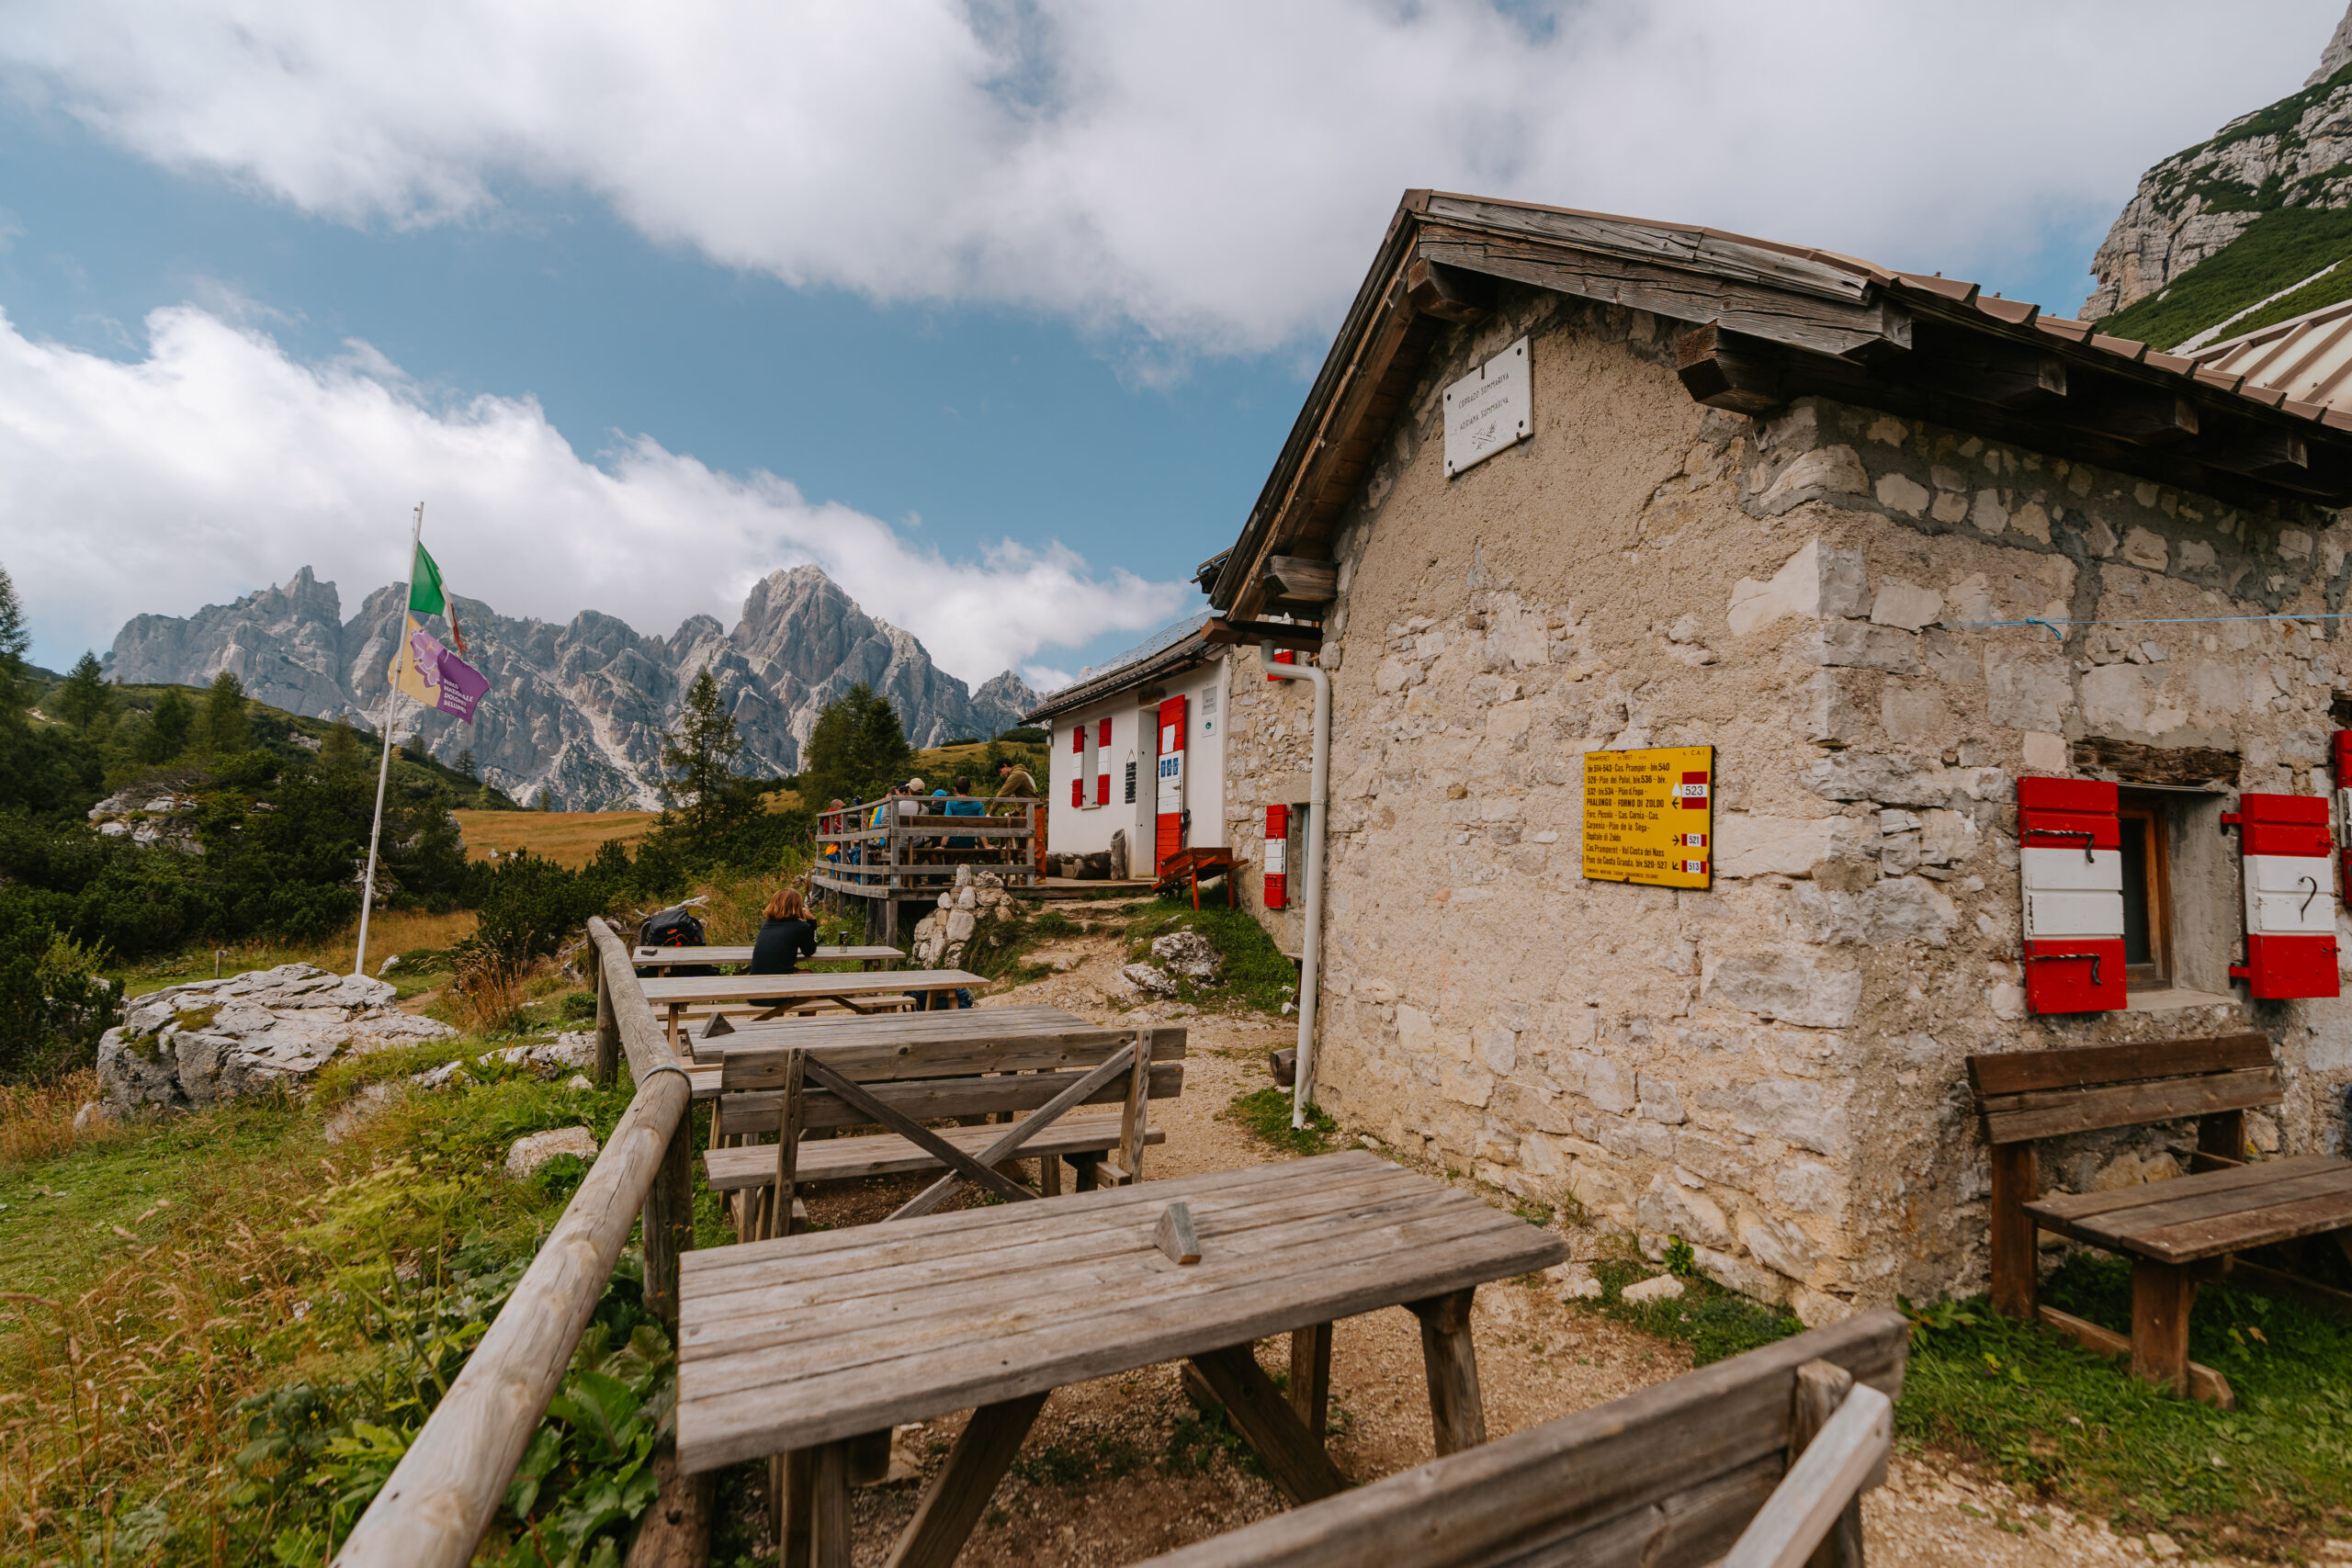
It took us around 4 hours to complete, and we were able to enjoy a sunny afternoon on Rifugio Pramperet’s patio while other hikers trickled in.
Although the setting for Rifugio Prampert is gorgeous, that’s about the only redeeming quality I could find. The staff was extraordinarily rude, the bathroom was not stocked with toilet paper or hand soap, and the showers you paid for were cold.
All of this was magnified when I became ill that evening with a GI bug and spent the entire night in the bathroom.
If you can, I highly recommend booking Rifugio Pian De Fontana and making this day longer. The hike from Carestiato to Pramperet is very reasonable, so adding the uphill at the end wouldn’t be too strenuous.
I genuinely believe it is worth it to avoid staying at Rifugio Pramperet.
Rifugio Pramperet Contact Information
I DO NOT RECOMMEND – Use the Contact Form
Rifugio Pian De Fontana – Email
Day 10: Rifugio Pramperet to La Pissa (or Forno di Zoldo)
Distance: 17 km ( 10.6 miles)
Time: 7.5 hours
Path Numbers: 514, 518, 503 (or 523, 540)
We planned to take the classic route to La Pissa bus stop and then catch the bus to Belluno. Unfortunately, I was incredibly dehydrated and sick, so we had to pivot and take the variant route to Forno di Zoldo.
To say I was relieved is an actual understatement. The route down to Forno di Zoldo is almost entirely downhill. My husband dragged me to the bus stop where I promptly took a 2-hour nap until the 1 p.m. bus arrived.
To do this route, you will need to catch the 025 bus from Forno Di Zoldo to Longarone. Then take bus 009 to Belluno FS.
We utilized the Dolomiti Bus App to see which bus stops we needed to be at and how many stops. Additionally, we bought our ticket on the bus using cash.
The route to La Pissa is much longer, clocking in at about 10.6 miles. It’s supposedly one of the most beautiful parts of the trail, so I’m sad to have missed it, but my body wouldn’t have been able to complete it.
Luckily, I did get some great information beforehand and from the other hikers the night before that is highly useful!
The first 3 miles of this section are all uphill, and the rest is a slow descent to the bus stop. Start early to crush the uphill section before the sun is too high, as there aren’t many shaded areas on this part.
Stop at Rifugio Bianchet for some lunch before making your way to the bus stop. Rifugio Bianchet also has the bus times for the La Pissa bus stop. It runs often enough that if you arrive before 4 p.m., you shouldn’t have any issues.
Exiting Alta Via 1
As mentioned above, there are multiple ways to exit the Alta Via 1. The main way is the La Pissa Bus Stop. The alternative route is Forno di Zoldo.
Most hikers take either option to the city of Belluno. It is recommended to spend at least a night here to relax and recuperate after many days on the trail.
We stayed at Casa Zavi, which was truly wonderful. The room was air-conditioned, an easy walk from the bus station, and close to many restaurants and cafes.
After time in Belluno, you will need to make your way back to the airport.
The fastest way to get to Venice Airport via bus from Belluno is by taking the REG16512 Calalzo Pieve Cadore Cortina to Longarone and then switching buses to 29S.dona’ – Autostazione at the Longarone FS station. This trip should take approximately 2.5 hours.
You can also take the train from Belluno to the Venice bus depot and then get on the local bus to the Marco Polo Airport. The trip times change, and it’s best to review the schedule online, but there are multiple options.
To get to the Milan Airport, you will need to take a train down to Venice and then transfer twice. This is why I recommend flying in and out of the Venice Marco Polo Airport, as logistics are a little simpler.
FAQ: Alta Via 1 Itinerary
How many days do you need in Alta Via 1?
The Alta Via 1 is typically completed in 8 to 11 days, depending on how fast you hike. I wouldn’t recommend doing it in less than 8 days, but you could complete it in more than 11 days if you want to take it slower.
What is the best section of the Alta Via 1?
The Alta Via has many gorgeous sections, but the hike from Rifugio Lagazoui to Rifugio Nuvolau and the section from Rifugio Coldai to Rifugio Tissi are some of the most spectacular portions.
Where do you sleep on Alta Via 1?
Hiking the Alta Via 1 consists of sleeping in Rifugios, which are simply mountain huts. These are hostel-style accommodations that vary in comfort level depending on whether they are privately owned and where they are located.
Which Alta Via is easiest?
Alta Via 1 is the easiest as it does not require any special equipment or technical hiking knowledge. The other Alta Vias require Via Ferrata gear and traverse more challenging terrain.
Is water available on the Alta Via 1?
There are numerous water sources each day on the Alta Via. It is essential to filter any water on this hike as there are a lot of cattle roaming the area. You can also purchase water from the Rifugios, but it is less economical and more difficult to refill if you drink a lot of water.
Wrap-Up: Hiking the Alta Via 1
Embarking on the Alta Via 1 is exciting and truly magical, but there is a lot of planning to consider before the actual trip. From booking Rifugios to planning necessary gear and ensuring that all pre-/post-accommodation is taken care of, this adventure is slightly more time-intensive than other trips.
That being said, the upfront effort is well worth your time, as this hike is something you’ll remember for a lifetime. The beautiful sunrises, delicious food, and incredible people you meet along the way are all part of this spectacular experience.
Read More:
The Ultimate Alta Via 1 Packing List
